Photoshop Basics
Doing More with Layers
Merging and flattening layers
If you no longer need to edit certain layers, you might consider merging them. There are many reasons you might want to combine certain layers. For example, if you have multiple adjustment layers you might want to merge them into a single layer before applying other changes, such as sharpening or noise reduction.
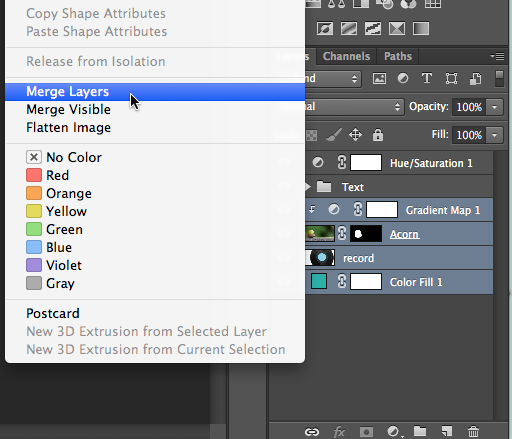
To merge layers, select the first layer, press and hold the Shift key, and click the last layer you wish to merge (all of the layers between the first and last will be selected). Next, right-click the layers and select Merge Layers. Alternatively, you could select the layers and then press Ctrl+E (Command+E on a Mac).

Merging will remove the flexibility and control that layers provide, so you should only combine layers if you're sure you no longer need to edit them individually.
Note: Make sure to right-click the layer name, not the layer icon. Otherwise, the menu will not appear.
You can also combine all of the layers in your document into a single Background layer. This is known as flattening the image. To do this, right-click any layer, then select Flatten Image.
Flattening an image is one way to simplify a complex Photoshop project. However, it's important to note that you do not need to flatten images before exporting them. When you save a project as a JPEG or PNG file, all of the layers will be flattened automatically because these file formats cannot have multiple layers.
Open the example file. Select the Gradient Map and Acorn layers, then merge them.
If you want to learn more about merging and flattening layers, check out this video tutorial on the Adobe website.


