Photoshop Basics
Levels, Curves, and Color
Curves
The Curves tool is similar to levels, but it gives you more power to control shadows, highlights, and midtones separately. Because it's a more advanced tool, you'll need to be careful when using it to adjust your images.
In the example below, you can see an image before adjusting curves. To the right, you can see the curve as it appears by default. Notice how the diagonal line is perfectly straight. When you make adjustments with curves, you're creating different curves with this line.


Increasing contrast
One of the simplest adjustment you can make with curves is to increase the contrast. To do this, you would drag the curve down in the shadows on the left to make them darker, and up in the highlights on the right to make them brighter:


Decreasing contrast
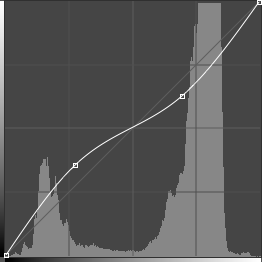
In this particular image, it might be better to decrease the contrast. To do this, you would drag the curve up in the shadows on the left to make them brighter, and down in the highlights on the right to make them darker. In the image below, you can see that this makes it easier to see details on the seagull's face:

Other adjustments
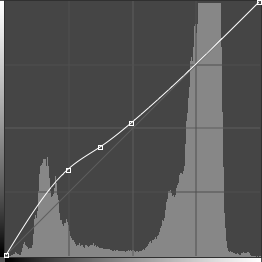
You could also increase the shadows without changing the highlights. To do this, you would drag up the curve in the shadows on the left. Notice how we used multiple points to gently bring the curve back to the default position; this helps to prevent the curve from affecting the highlights or midtones. This allows us to make the seagull brighter without darkening or lightening the clouds:

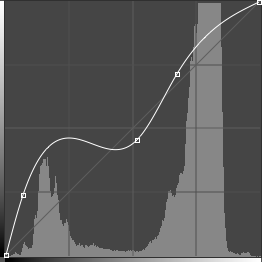
You'll want to avoid using big, steep curves—anytime the curve moves too far away from the diagonal line, it will usually create problems in the image. In the example below, notice how the curve dramatically changes direction near the middle. This causes a significant loss of detail in the midtones, giving the seagull a flat, unnatural look:

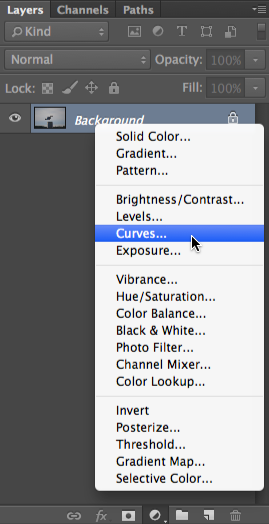
To adjust curves:
- Add a Curves adjustment layer.
- Click anywhere on the line in the Properties panel to create a new point, then click and drag the point to adjust the curve. Note: Be careful not to move the two points in the lower-left and upper-right corners. It is possible to adjust these, but we recommend keeping them in the corners until you gain more experience with curves.
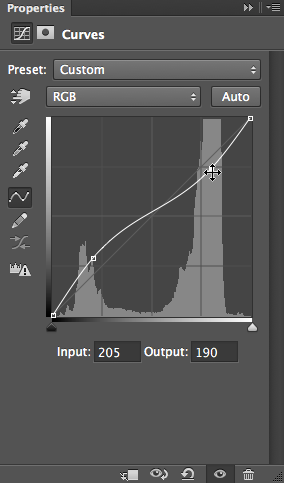
- Continue to adjust the points until you're satisfied with the result. You can also press the Delete key or click and drag a point off the line to remove it.
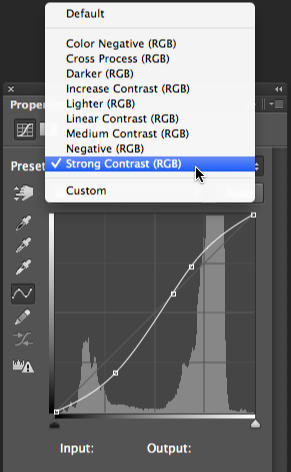
If you're new to curves, you may want to select one of the Preset options and then make small adjustments to the curve as needed. If you need to start over, you can select Default from the Presets menu.
Using Curves in Photoshop Elements
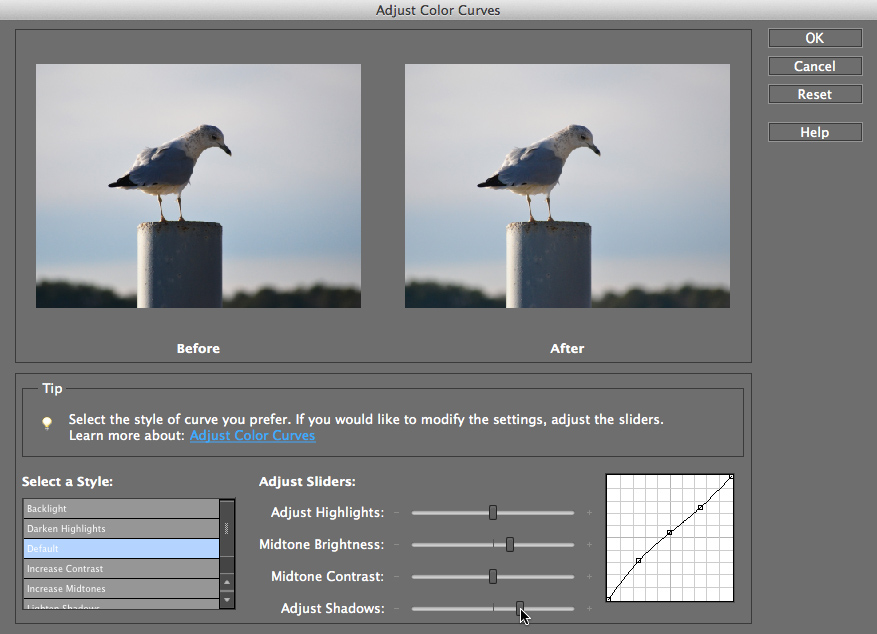
If you're using Photoshop Elements, you won't be able to create a Curves adjustment layer, but there is a similar tool you can use. To access this tool, select Enhance Adjust Color
 Adjust Color Curves. You can then click and drag the sliders to adjust the curve.
Open the seagull_fullsize.jpg example file and add a Curves adjustment layer. Try using some of the different options from the Presets menu, then move points on the curve to see the effect.


