Photoshop Basics
Levels, Curves, and Color
Levels
Every image has a mix of shadows, highlights, and midtones. Shadows are the darkest parts of the image, highlights are the brightest parts, and midtones are everything in between. When you adjust levels, you're adjusting these different tones. And while you could use the brightness and contrast tools for a similar type of adjustment, they're much less powerful than levels.
There are many different reasons to use a levels adjustment. For instance, if you have a particularly dark—or underexposed—image, you might want to make the midtones and highlights brighter while keeping the shadows relatively dark. You can see an example of this in the images below:
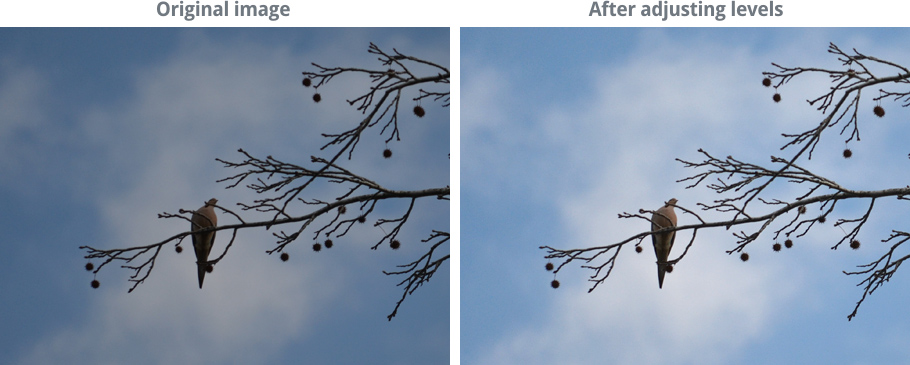
If you've never adjusted levels before, this tool may feel a little unintuitive at first. At this stage, the most important thing is to practice making different adjustments. As you start to gain more experience, you'll be able to use it more effectively. And remember, if an adjustment doesn't look right, you can always undo your changes and start over.
To adjust levels:
- In the Layers panel, add a Levels adjustment layer.
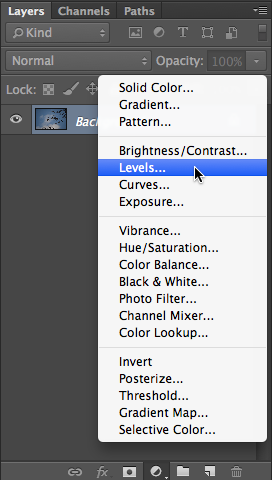
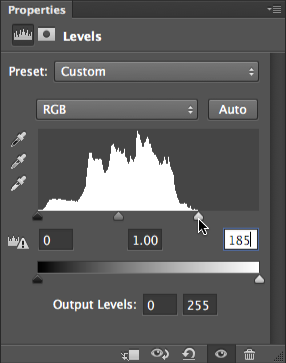
- Locate the graph in the middle of the Properties panel. This is called a histogram, and it shows information about the shadows, highlights, and midtones of the image. In this example, you can see that there's a big gap on the right side with no information, which means the image is underexposed. We can use a levels adjustment to fix this.
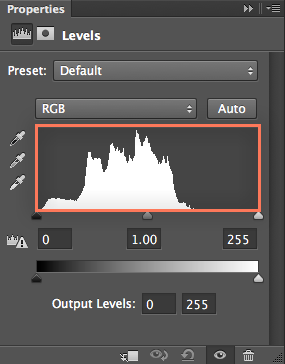
- Notice the Input Levels sliders just below the histogram—these are the controls you'll use the adjust the levels. Do not use the Output Levels sliders near the bottom of the panel.
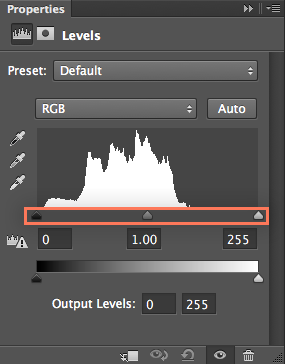
- Because our image is too dark (underexposed), we'll click and drag the white slider to the left. Notice how we're dragging the slider to the right-most edge of the histogram. Be careful not to drag the slider past this point, or you will begin to lose detail in your image. This is commonly referred to as clipping.
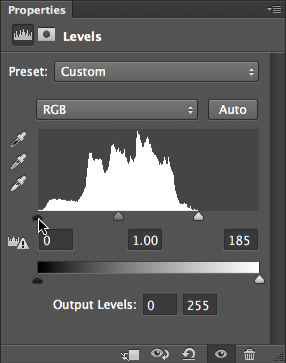
- If the shadows in the image are too bright, you can click and drag the black slider to the right. In this example, we don't need to adjust this because the slider is already at the left-most edge of the histogram.
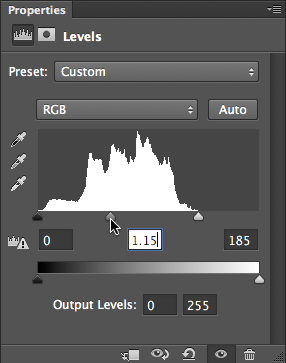
- Optional: If the image still looks too dark or too bright, you can click and drag the middle (gray) slider to adjust the midtones. In this example, we'll move the slider to the left to make the image brighter.
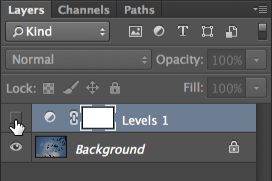
- Optional: Try turning the adjustment layer off and on to compare the new levels adjustments with the original image. This will allow you to see exactly what the adjustment layer is doing. If desired, you can then make further adjustments to the levels.
Open the dove_fullsize.jpg example file and add a Levels adjustment layer. Click and drag each of the Input Levels sliders in the Properties panel to see the effect. Try to find the settings that look best for this image.
Check out our extra on Reading a Histogram to learn more about what the histogram can tell you about an image.


