Excel 2013
Modifying Columns, Rows, and Cells
Wrapping text and merging cells
Whenever you have too much cell content to be displayed in a single cell, you may decide to wrap the text or merge the cell rather than resizing a column. Wrapping the text will automatically modify a cell's row height, allowing cell contents to be displayed on multiple lines. Merging allows you to combine a cell with adjacent, empty cells to create one large cell.
To wrap text in cells:
In our example below, we'll wrap the text of the cells in column D so the entire address can be displayed.
- Select the cells you wish to wrap. In this example, we'll select the cells in column D.
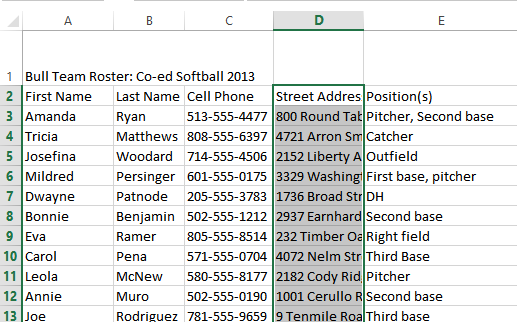 Selecting cells to wrap
 - Select the Wrap Text command on the Home tab.
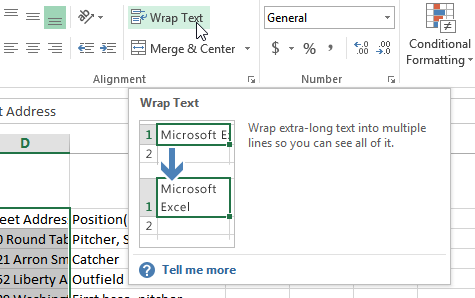 Clicking the Wrap Text command
 - The text in the selected cells will be wrapped.
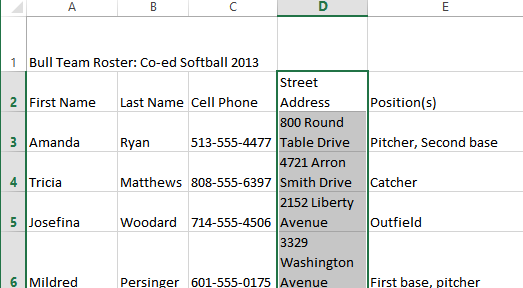 The wrapped text
Click the Wrap Text command again to unwrap the text.
To merge cells using the Merge & Center command:
In our example below, we'll merge cell A1 with cells B1:E1 to create a title heading for our worksheet.
- Select the cell range you want to merge together.
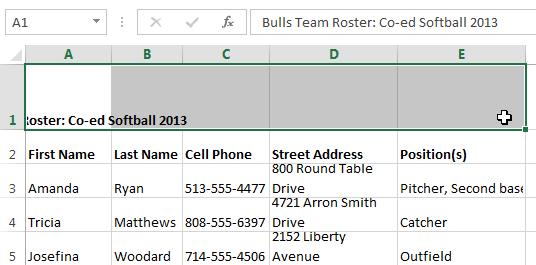 Selecting cell range A1:E1
 - Select the Merge & Center command on the Home tab.
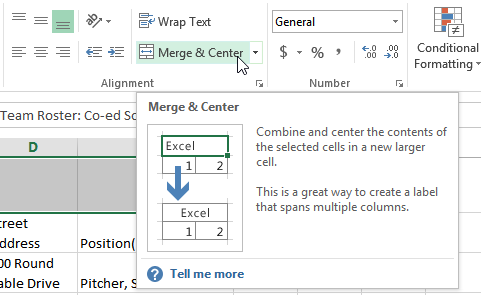 Clicking the Merge & Center command
 - The selected cells will be merged, and the text will be centered.
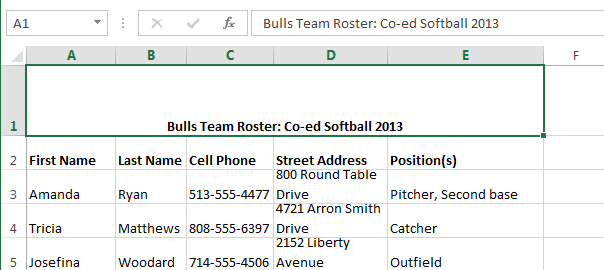 Cell A1 after merging with B1:E1
To access more merge options:
Click the drop-down arrow next to the Merge & Center command on the Home tab. The Merge drop-down menu will appear. From here, you can choose to:
- Merge & Center: Merges the selected cells into one cell and centers the text
- Merge Across: Merges the selected cells into larger cells while keeping each row separate
- Merge Cells: Merges the selected cells into one cell, but does not center the text
- Unmerge Cells: Unmerges selected cells
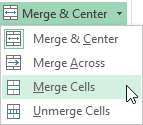 Accessing more Merge options


