

Excel 2013
Modifying Columns, Rows, and Cells
To delete rows:
It's easy to delete any row that you no longer need in your workbook.
- Select the row(s) you want to delete. In our example, we'll select rows 6-8.
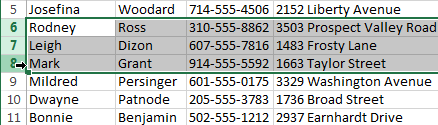 Selecting rows to delete
 - Click the Delete command on the Home tab.
 Clicking the Delete command
 - The selected row(s) will be deleted, and the rows below will shift up. In our example, rows 9-11 are now rows 6-8.
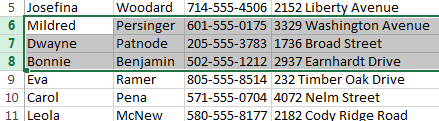 Rows 9-11 shifted up to replace rows 6-8
To delete columns:
- Select the columns(s) you want to delete. In our example, we'll select column E.
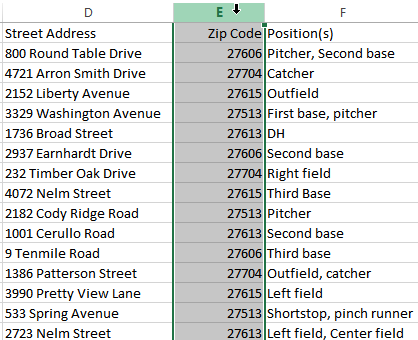 Selecting a column to delete
 - Click the Delete command on the Home tab.
Clicking the Delete command - The selected columns(s) will be deleted, and the columns to the right will shift left. In our example, Column F is now Column E.
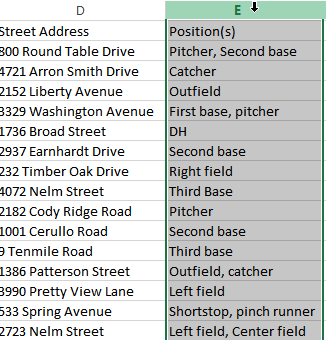 Column F shifted right to replace column E
It's important to understand the difference between deleting a row or column and simply clearing its contents. If you want to remove the content of a row or column without causing others to shift, right-click a heading, then select Clear Contents from the drop-down menu.
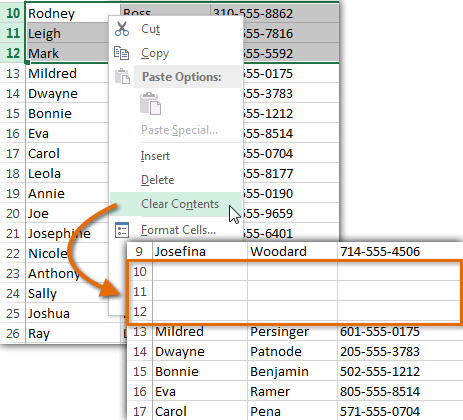 Clearing the contents from several rows


