DRYIT Semi-Continuous Tray Drier
Practical Action
Operation and Maintenance
Operation
What follows is a step-by-step description of the use of the drier.
1. Load 15 trays fully and evenly with the material to be dried.
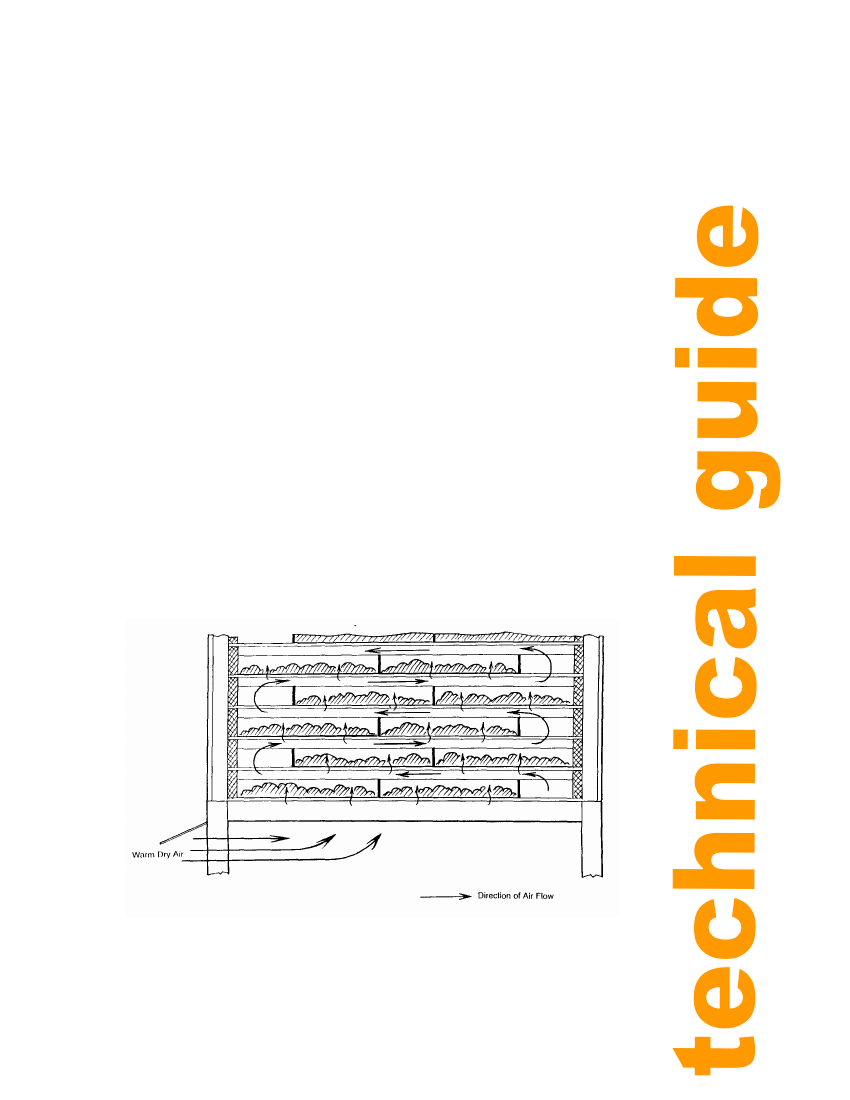
2. Load the trays into the drier with the open ends alternating between back and front, with
the bottom tray opening at the front, as shown in figure 28
3. Close the doors and start the blower
4. Now fill the spare tray with material be dried.
5. After the specified drying period for the particular product, pull down on the operating
lever and put the handle under the handle hook.
6. Open the small lower door and remove the bottom tray using the long handled metal
hook NOT by the tray wall.
7. Remove the lever from the handle hook and raise it in a controlled manner. There will be
a bang as the trays fall past the lifting fingers.
8. Open the top door of the direr and carefully slide the filled spare tray in and close the top
door.
9. Empty the removed tray of dry product and refill it with material to be dried.
10. Wait for the specified drying period and then remove the bottom tray as described in 4
and slide in full tray etc. etc.
Direction of airflow
Figure 28: Alternating open ends and airflow
28