Photoshop Basics
Getting to Know the Photoshop Interface
Changing the zoom level
When you're editing an image in Photoshop, you'll often be viewing it at less than 100% of its full size. That's because most modern digital cameras take large, high-resolution photos. These images are so large, in fact, that most computer screens can't display all of the pixels in the image at once. This is actually a good thing, because it means you'll have extra detail to work with as you edit the image.
If you want to zoom in or out, simply press Ctrl+ or Ctrl- (hold the Ctrl key and then press the + or - key). If you're using a Mac, you'll press Command+ or Command-.
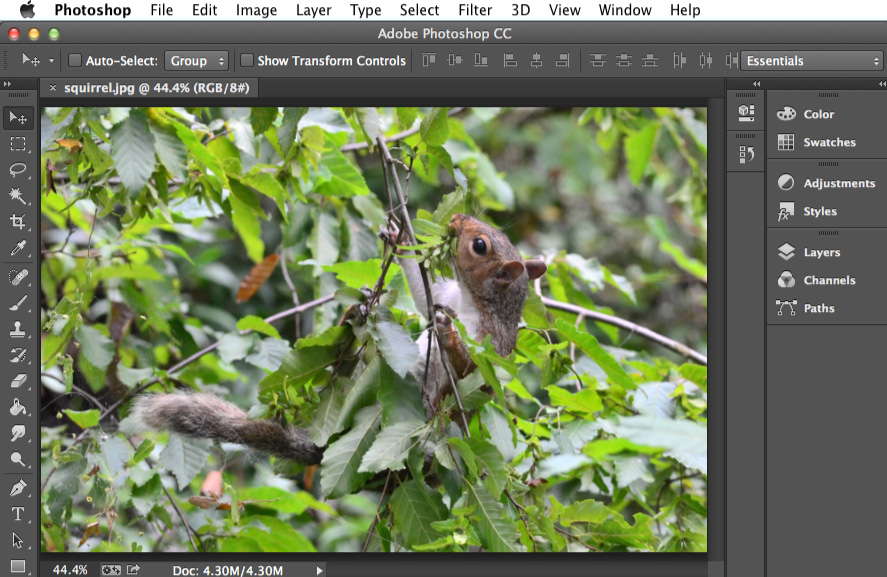
In the example below, you can see a document at 44.4% of its full size. Notice that you can see the current zoom level at the top of the document window, as well as in the bottom-left corner of the screen.

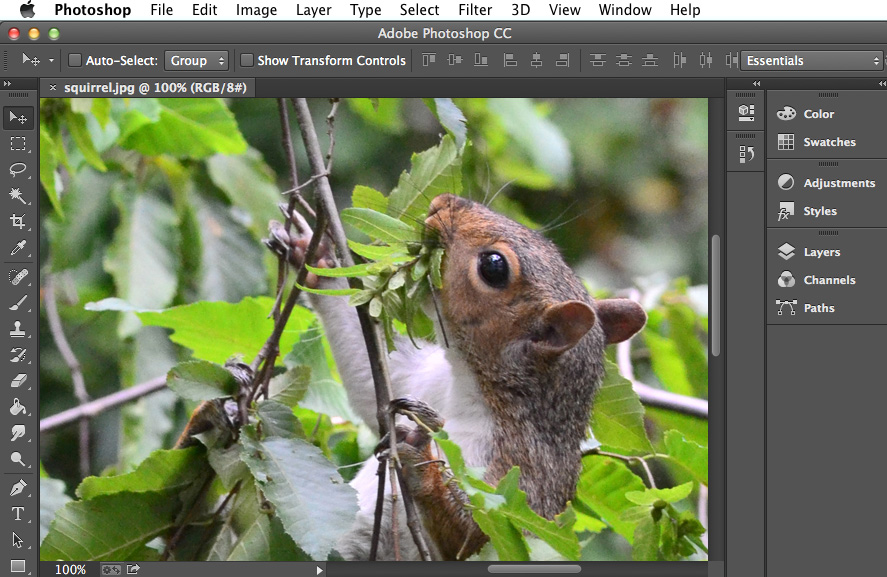
By contrast, the example below shows the same image at 100% (full size). Notice that only part of the image is visible at this zoom level. If desired, you can use the horizontal and vertical scroll bars to view other parts of the image.

To zoom the image to fit the document window, press Ctrl+0 (hold the Ctrl key and then press the zero key). If you're using a Mac, you'll press Command+0.
Depending on your computer's graphics card, some zoom levels (such 33.33% and 66.67%) can cause the image to appear pixelated. If this happens, you may want to zoom to 25% or 50% instead.
Use the keyboard shortcuts above to adjust the zoom level of the example file.
Once you've become familiar with the Photoshop interface, you're ready to start editing images. We'll talk more about some of the most basic adjustments you can make—such as cropping, resizing, and rotating—in the next lesson.


