Excel 2010
Printing
To use Print Titles:
Imagine how difficult it would be to read a worksheet if the column and row headings only appeared on the first page. The Print Titles command allows you to select specific rows and columns to appear on each page.
- Click the Page Layout tab.
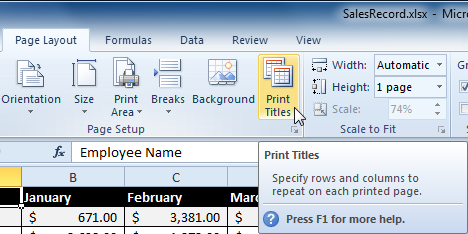
- Select the Print Titles command.
 Selecting the Print Titles command
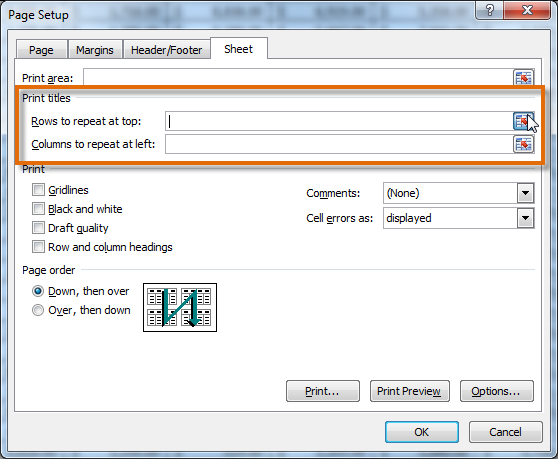
 - The Page Setup dialog box appears. Click the icon at the end of the Rows to repeat at top field.
 Clicking on icon
 - Your mouse becomes the small selection arrow
 . Click on the rows you want to appear on each printed page. The Rows to repeat at top dialog box will record your selection.
 Clicking on row 1
 - Click the icon at the end of the Rows to repeat at top field.
 Clicking on icon
 - Repeat for Columns to repeat at left, if necessary.
- Click OK. You can go to Print Preview to see how each page will look when printed.
To insert a break:
- Click the Page Layout tab.
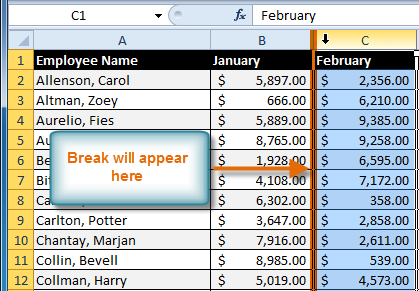
- Determine the placement of the break by clicking on the row below, cell below, or column to the right of where you want the break to appear. For example, select column C, and a break will appear after column B.
 Selecting the column to the right of where the break will appear
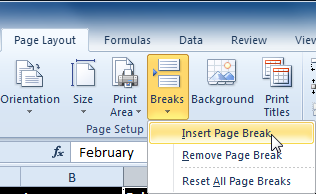
 - Select the Insert Page Break command from the Breaks drop-down menu.
 Selecting the Insert Page Break command
 - The break is inserted. You can go to Print Preview to confirm it appears in the correct place on the page.


