PowerPoint 2013
Inserting Audio
Editing audio
You can modify your audio files using the commands on the Playback tab. For example, if you add a song to a slide you can trim it to play only a brief section. You can also add a fade in and fade out, and add bookmarks that allow you to jump to specific points in the audio file.
To trim an audio file:
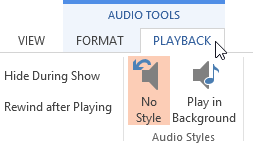
- Select the audio file, then click the Playback tab on the Ribbon.
 Clicking the Playback tab
 - Click the Trim Audio command.
 Clicking the Trim Audio command
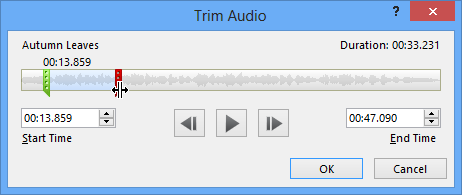
 - A dialog box will appear. Use the green handle to set the start time and the red handle to set the end time.
 Setting the start and end time
 - To preview the audio file, click the Play button.
 Clicking the Play button to preview the changes
 - Adjust the handles again if necessary, then click OK.
To add a fade in and fade out:
- On the Playback tab, locate the Fade In: and Fade Out: fields.
- Type in the desired values, or use the up and down arrows to adjust the times.
 Adding a Fade In and Fade Out
To add a bookmark:
- Click the timeline to locate the desired part of the audio file.
 Selecting the desired location in the audio file
 - From the Playback tab, click the Add Bookmark command.
 Clicking the Add Bookmark command
 - The bookmark will appear on the timeline. Click the bookmark to jump to that location.
 The added bookmark
Audio options
There are other options you can set to control how your audio file will play. These are found in the Audio Options group on the Playback tab.
 The Audio Options group
- Volume: Changes the audio volume.
- Start: Controls whether the audio file starts automatically or when the mouse is clicked.
- Hide During Show: Hides the audio icon while the slide show is playing.
- Play Across Slides: Continues playing the audio file across multiple slides, instead of just the current slide.
- Loop until Stopped: Replays the audio file until stopped.
- Rewind after Playing: Returns the audio file to the beginning when it is finished playing.


