Google Sheets
Sorting and Filtering Data
Sorting and filtering data
When working with Google Spreadsheets, sometimes you may wish to reorganize the data so you can easily find the information you're looking for. Sorting allows you to change or customize the order of your spreadsheet data. For example, in preparation for a charity event you could organize the volunteer list by name and T-shirt size so you can determine how many T-shirts you need in each size.
Filters can be applied in many different ways to improve the performance of your worksheet. They are useful for displaying only the data that interests you. For example, you could apply a filter to a party guest list to view only the people who responded to the invitation, or sort the genres of a song list to display only rock and roll songs or classical music.
Types of sorting
When sorting data, it's important to first decide if you would like the sort to apply to the entire sheet or to a selection of cells.
- Sort sheet organizes all of the data in your spreadsheet by one column. Related information across each row is kept together when the sort is applied. In the image below, the Name column has been sorted to display the client names in alphabetical order. Each client's address information has been kept with each corresponding name.
 An alphabetically sorted sheet
 - Sort range sorts the data in a range of cells. When working with a sheet that contains several tables, you may wish to sort the data of a single table. Sorting a range will not affect the data on the rest of the sheet, and it will keep related information across the row together.
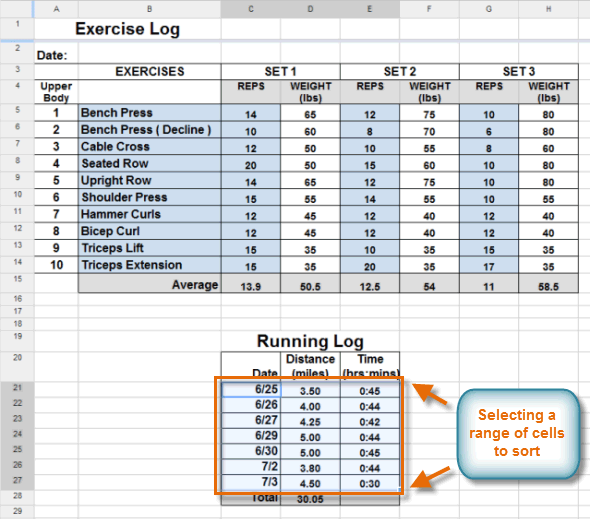 Sorting a range of cells
To sort a sheet:
In our example, we will sort a library's books on loan list to easily see which books have been checked out most often. We will freeze the header row so the header labels will not be included in the sort.
- Click View and hover the mouse over Freeze rows. Select Freeze 1 row from the menu that appears.
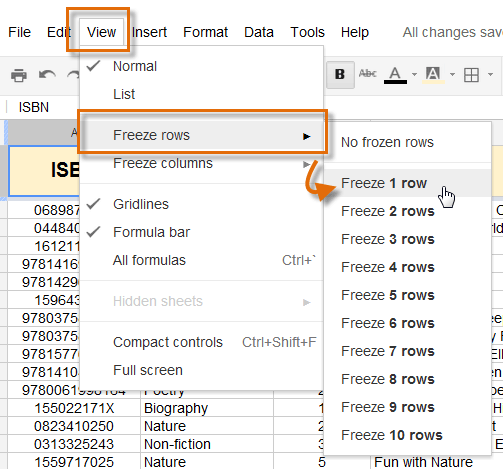 Freezing the header row
 - The header row freezes. Decide which column will be sorted, then click on a cell in the column. In our example, we will click on a cell in the Loan Count column to reorganize the books by the number of times they have been loaned.
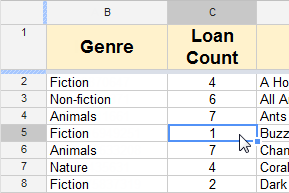 Selecting a cell in the desired column
 - Click Data and select Sort Sheet by column, A-Z (ascending) or Sort Sheet by column, Z-A (descending). In our example, we will select Sort Sheet by column, Z-A to display the most often loaned books at the top of the list.
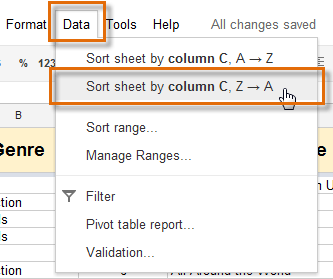 Selecting Sort sheet by column
 - The sheet will be sorted according to your selection.
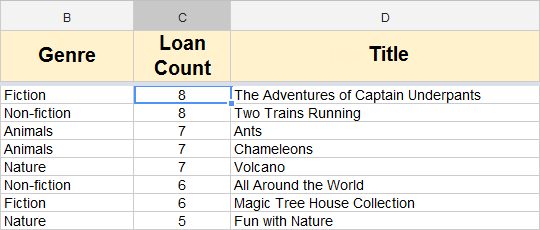 The sorted data
To sort a range:
In our example, we will sort a range of data in an exercise log. We will reorganize the data to display the jogging distance in ascending order.
- Highlight the range of cells you wish to sort. In this example, we will select the range C21:E27.
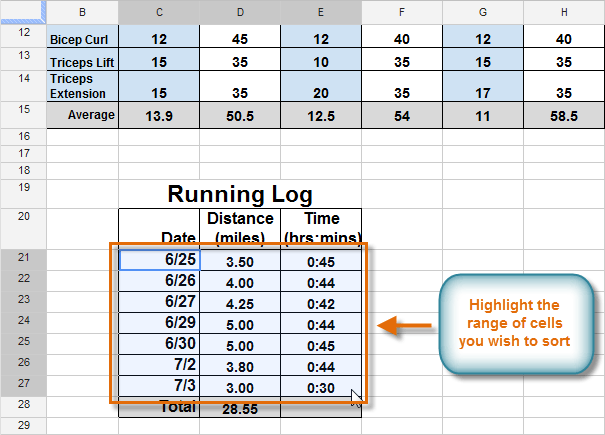 Highlighting a range of cells
 - Click Data and select Sort range... from the drop-down menu.
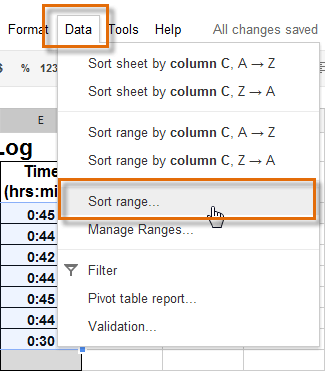 Selecting Sort range...
 - The Sorting dialog box appears. Select the desired column you wish to sort by, then select ascending or descending.
- Click Sort.
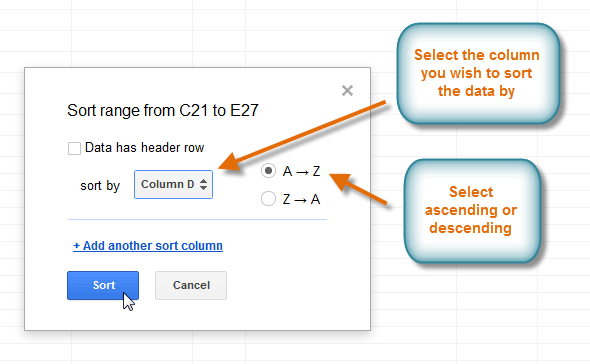 Setting the sort range options
 - The range will be sorted according to your selections (in our example, the data has been sorted in ascending order according to the distance column).
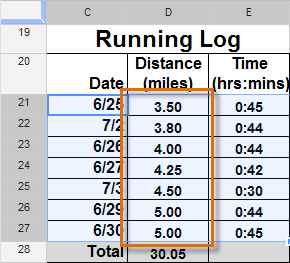 The sorted range of cells


