Excel 2013
Page Layout
To include Print Titles:
If your worksheet uses title headings, it's important to include these headings on each page of your printed worksheet. It would be difficult to read a printed workbook if the title headings appeared only on the first page. The Print Titles command allows you to select specific rows and columns to appear on each page.
- Click the Page Layout tab on the Ribbon, then select the Print Titles command.
 Clicking the Print Titles command
 - The Page Setup dialog box will appear. From here, you can choose rows or columns to repeat on each page. In our example, we'll repeat a row.
- Click the Collapse Dialog button next to the Rows to repeat at top: field.
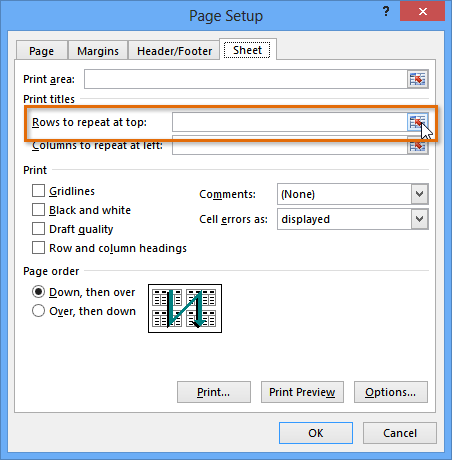 Clicking the Collapse Dialog Button
 - The cursor will become a small selection arrow
 and the Page Setup dialog box will be collapsed. Select the row(s) you want to repeat at the top of each printed page. In our example, we'll select row 1.
 Selecting row 1
 - Row 1 will be added to the Rows to repeat at top: field. Click the Collapse Dialog button again.
 Clicking the Collapse Dialog button
 - The Page Setup dialog box will expand. Click OK. Row 1 will be printed at the top of every page.
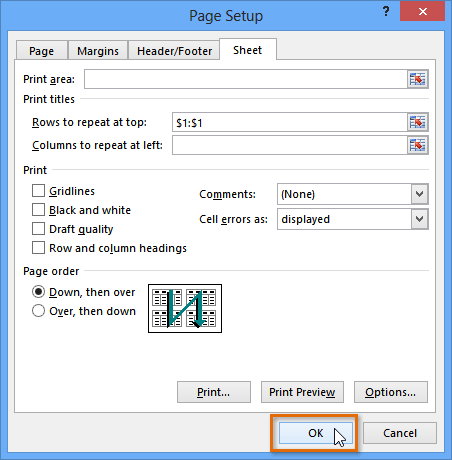 Clicking OK
To insert a page break:
If you need to print different parts of your workbook across separate pages, you can insert a page break. There are two types of page breaks: vertical and horizontal. Vertical page breaks separate columns, while horizontal page breaks separate rows. In our example, we'll insert a horizontal page break.
- Locate and select the Page Break view command. The worksheet will appear in Page Break view.
 Selecting Page Break View
 - Select the row below where you want the page break to appear. For example, if you want to insert a page break between rows 28 and 29, select row 29.
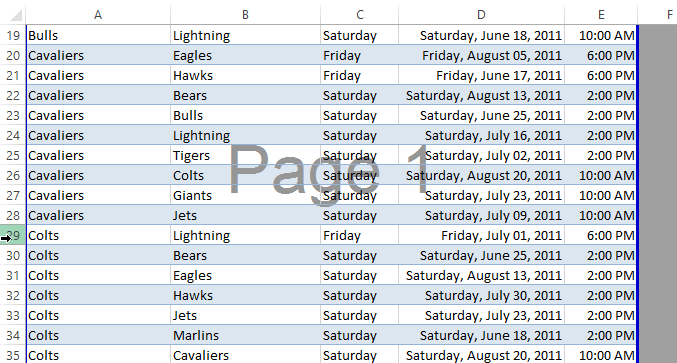 Selecting a row
 - Click the Page Layout tab on the Ribbon, select the Breaks command, then click Insert Page Break.
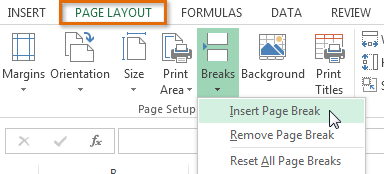 Inserting a page break
 - The page break will be inserted, represented by a dark blue line.
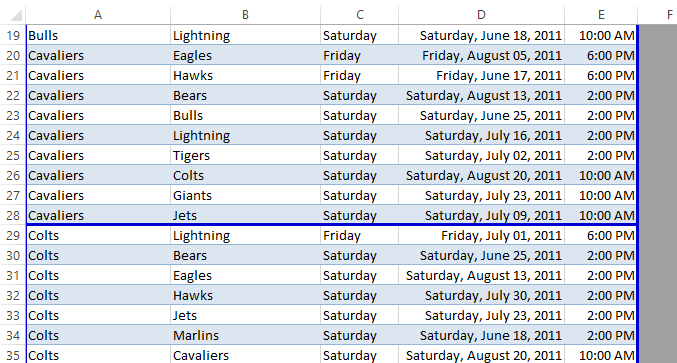 The inserted page break
When viewing your workbook in Normal view, inserted page breaks are represented by a solid gray line, while automatic page breaks are represented by a dashed line.
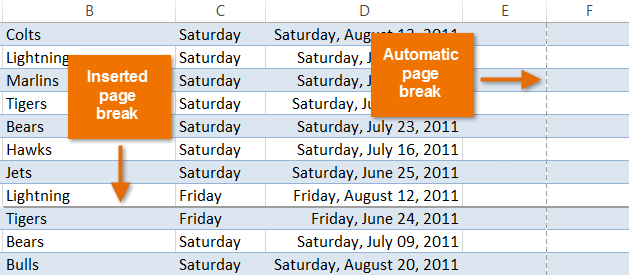 Viewing inserted and automatic page breaks in Normal view


