Access 2010
Formatting Forms
Modifying form layout
When you create a form, Access arranges the form components in a default layout where the fields are neatly stacked on top of each other, all exactly the same width. While this layout is functional, you might find that it doesn't fit your information in the best way. For instance, in the form below, most of the fields are almost completely empty, since the data stored there doesn't take up much room.
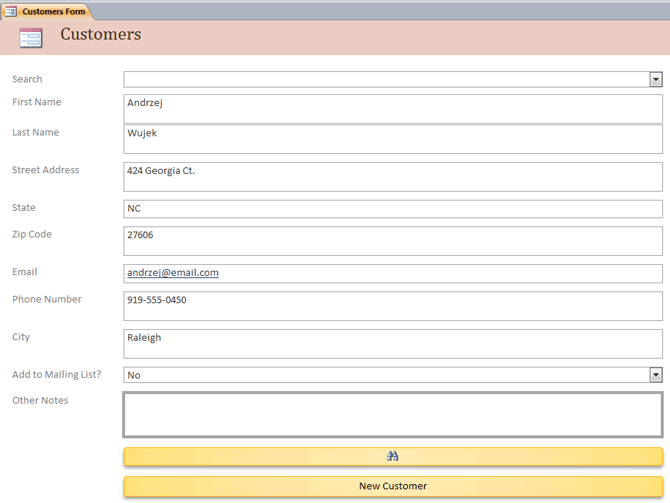 A form with the default layout
The form would fit the data a little better if we made the fields and command buttons smaller, and if we put some of them side by side. However, with the default layout, you won't be able to put two fields next to each other or resize one field or button without resizing them all. This is because Access lines up form components in rows and columns. When you resize a field, you're really resizing the column that contains it.
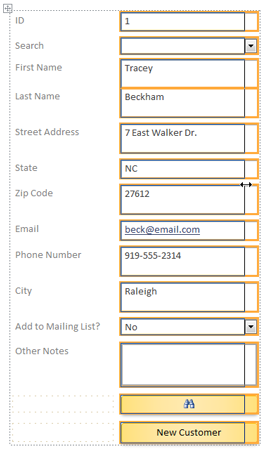 All of the selected fields are contained in one column, making it impossible to resize just one
To resize and rearrange our fields the way we want, we'll have to modify the form layout. For instance, since the default layout for our form contains only two columns—one for the field labels and another for the fields—we would have to create a new column to put two fields side by side.
We can do this using the command on the Arrange tab, which contains all of the tools you need to customize your form's layout. If you've ever built and modified tables in Microsoft Word, you already know how to use most of these tools. If you're unfamiliar with tables, review our Word 2010: Working with Tables lesson.
 The commands on the Arrange tab
To resize form components:
- Switch to Layout view.
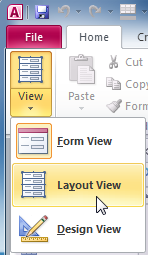 Switching to Layout View
 - Select the field or button you would like to resize, and hover your mouse over the edge. Your cursor will become a double-sided arrow
 .
.
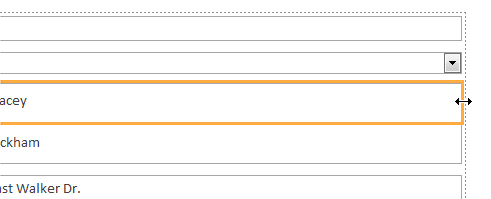 Clicking the edge of a field to resize it
 - Click and drag the edge to resize, and release when the field or button is the desired size.
 Resizing the field
 - The field or button, as well as every other item in line with it, will be resized.
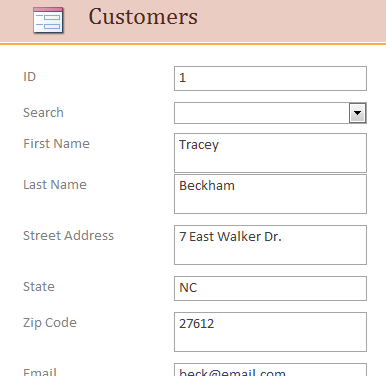 The resized fields
To move form components:
- If necessary, add columns or rows to make room for the field or button you wish to move by using the Insert commands in the Rows & Columns group.
In our example, we want to move the Last Name field to the right of the First Name field, so we'll have to create two new columns to the right: one for the field label, and one for the field itself. To do this, we'll click the Insert Right command twice.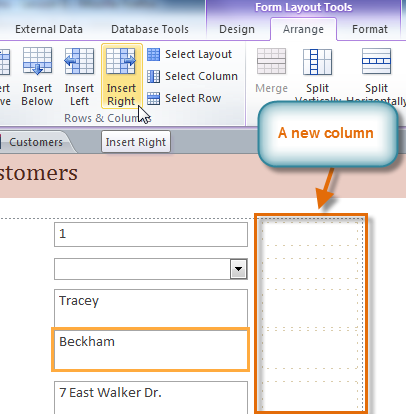 Inserting a new column
 - Click and drag the field or button to its new location. If you're moving a field, make sure to move the field label as well.
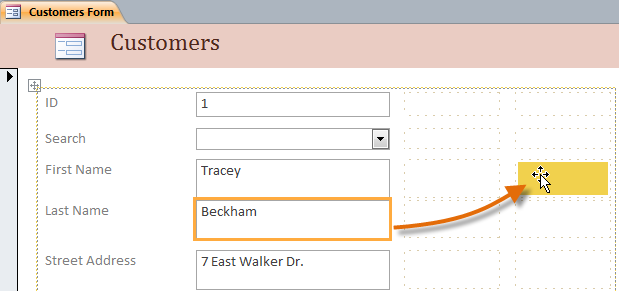 Moving the field
 - Repeat steps one and two with any other fields or buttons you wish to move.
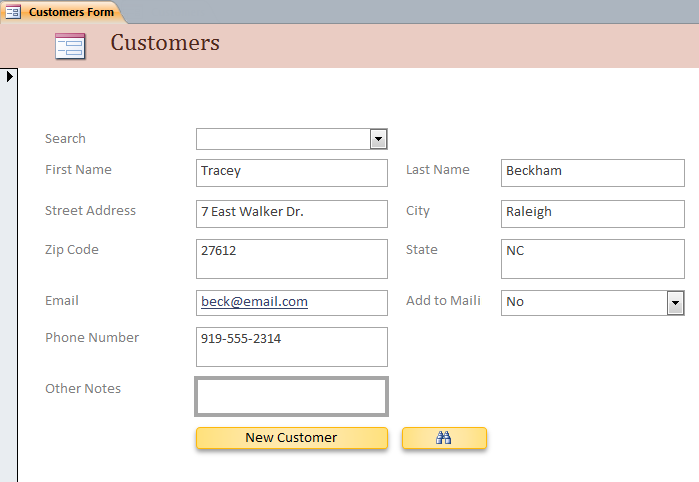 Many fields have been moved
If you would like to make a field take up more or less space than one column, you can use the Merge and Split commands. The Merge command combines two or more cells, while the Split command divides a cell.
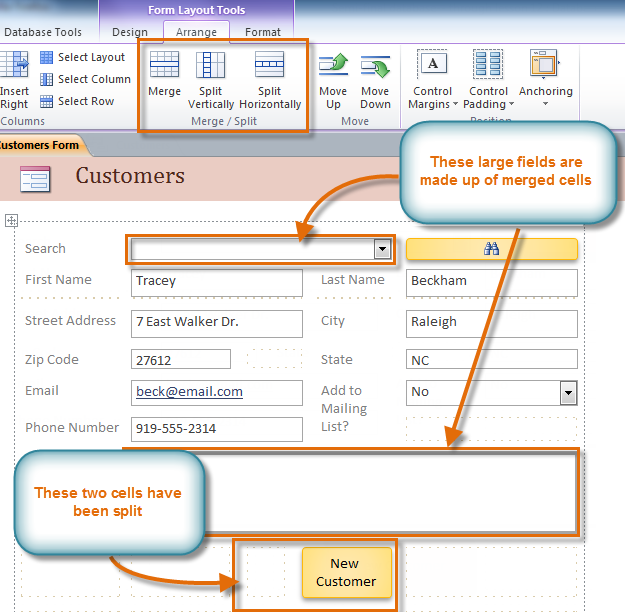 Fields in merged and split cells


