Tech Savvy Tips and Tricks
Browsing Privately
Do Not Track

In case you weren't aware, websites have the ability to track what you click on. This is usually done to deliver targeted ads to you, but it can also be used for collecting data and making a site run smoother. Currently, browsers let you choose not to participate in this system by offering a Do Not Track option.
Understanding Do Not Track
Do Not Track asks each website you visit to not track your activities. It is similar to the national Do Not Call list. However, website participation in Do Not Track is voluntary, so some of the websites you visit may not honor the request. To learn more about how your browsing activity is tracked, visit our Internet Safety lesson on Staying Safe While Browsing.
Turning on Do Not Track
Internet browsers generally place the Do Not Track option in the Privacy settings. By default, most browsers have this feature turned off. You will need to open your browser's privacy settings to enable it.
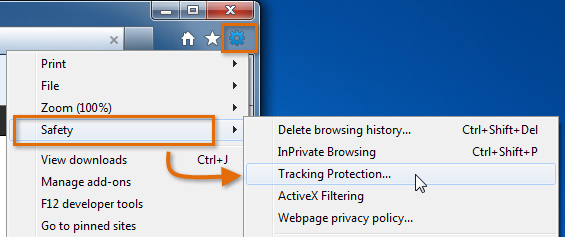
In Internet Explorer, the Do Not Track option is located in the Safety menu.
- Click the gear icon
 . Hover the mouse over Safety, then select Tracking Protection from the menu that appears.
 Selecting Tracking Protection
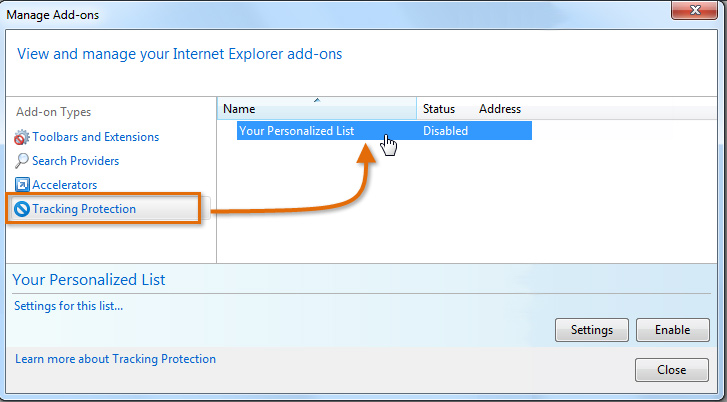
 - The Manage Add-ons dialog box will appear. Click Tracking Protection, then click Your Personalized List.
 Clicking Your Personalized List
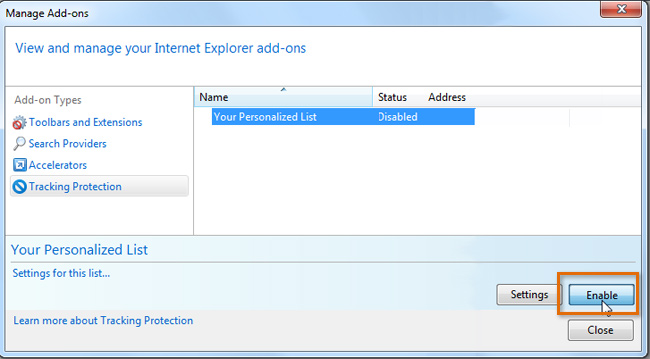
 - Click the Enable button.
 Enabling Do Not Track
 - The status of Your Personalized List will change to Enabled. Do Not Track is now on.
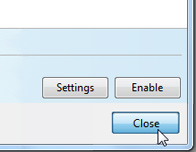
- Click Close to return to Internet Explorer.
 Clicking Close
Enabling Do Not Track in other browsers
To view instructions for how to enable Do Not Track in Firefox, Chrome, and Safari, follow the links below:
- Do Not Track - Firefox (Mozilla Support Center)
- Do Not Track - Chrome (cnet.com)
- Do Not Track - Safari (Apple Support Center)
Older versions of browsers may not support the Do Not Track option. You may need to update your browser to the most recent version.


