Publisher 2003
Configuring Publisher
Configuring Publisher
Watch the video! (7:32 min)
You can configure Publisher in many different ways. You have the ability to change default settings, move toolbars, display or hide specific buttons, and more. As you become more familiar with Publisher, you may find that you have a preference as to how you accomplish specific tasks. In the meantime, you may want to configure Publisher in the way we recommend.
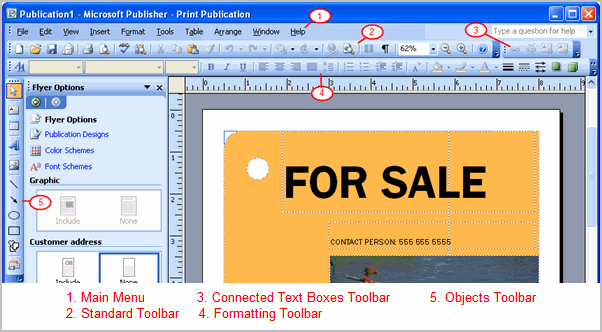
The Publisher window:
Depending on whether the version of Publisher on your computer has been used before, various toolbars may appear by default when you first open Publisher. Take a look at the toolbars displayed in the example below.

To move toolbars to a different location on the screen:
- Place your cursor over the dotted line at the end of the toolbar.
- Click and drag the toolbar to the desired location on the screen.
- Release the mouse button.
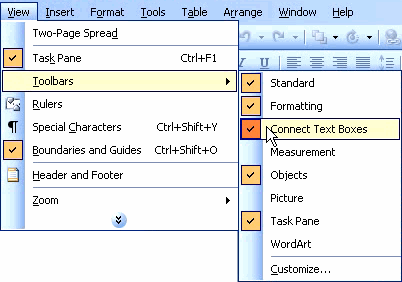
To switch a toolbar on or off:
- Select View
 Toolbars from the main menu.
 - Select any toolbar to turn it on or off.
- Check mark: The toolbar is currently displayed if there is a check mark beside it.
- No check mark: The toolbar is not displayed if there is no check mark beside it.

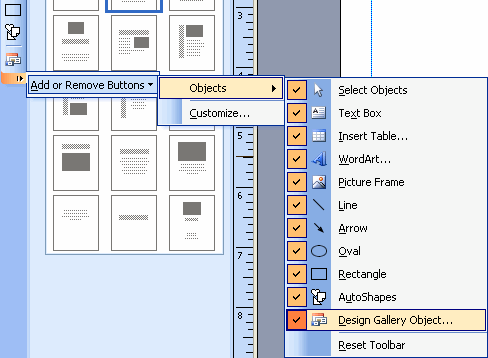
To add or remove buttons to a toolbar:
- Select the drop-down arrow at the end of each toolbar.
- Select Add or Remove Buttons.
- Select the name of the toolbar.
- Select a button to display or hide it.
- Check mark: The button is currently available if there is a check mark beside it.
- No check mark: The button is not available if there is no check mark beside it.

To access the Options dialog box:
- Select Tools
 Options from the main menu. The Options dialog box will appear.

 We recommend maintaining the default settings until you are more familiar with Publisher.
To access the help features:
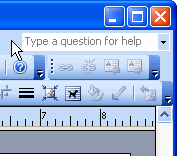
- Enter any keywords in the Quick Search box.
- Click Enter on your keyboard. The search results will appear in the task pane.

 You can always use the Help feature from the main menu.


