Photoshop Basics
Understanding Layers
Introduction
Have you ever wondered how people achieve such great results with Photoshop? While there are many different image editing techniques, there's one tool Photoshop professionals use with almost every project: layers. Learning how to use layers is probably the most important thing you can do to become better at Photoshop. In this lesson, we'll talk about how layers work, the different types of layers, and the basics of creating and using layers.
If you'd like to follow along with the lesson, you can download our example file. We're planning to send this file as an email attachment and post it on the Web.
What are layers?
You can think of layers as transparent panes of glass stacked on top of one another, which allow different parts of each layer to show through. There are many types of layers you'll use in Photoshop, and they fall into two main categories:
- Content layers: These layers contain different types of content, such as photographs, text, and shapes.
- Adjustment layers: These layers allow you to apply adjustments to the layers below them, such as saturation or brightness. Adjustment layers are a type of nondestructive editing because they don't actually change anything about the original image.
When using layers, it may be helpful to turn individual layers on and off to see how they affect the image. You can do this by clicking the eye icon next to each layer name.
Click the eye icons in the interactive below to practice turning different layers on and off. Notice how hiding content layers like the Background layer has a more noticeable effect than hiding adjustment layers like the Adjust Levels layer.
Why use layers?
At this point, you may be wondering why you even need to use layers. Wouldn't it just be easier to work with everything in your image at once? The truth is, layers give you an amazing amount of flexibility and control because you can edit each layer independently from the rest of the image. Once you become comfortable with layers, you'll use them all the time.
Layer basics
Now you're ready to start working with layers in Photoshop. You can view, create, and edit layers with the Layers panel. This will usually be found in the lower-right corner of the screen, although you can always go to Window Layers to make sure it's turned on.
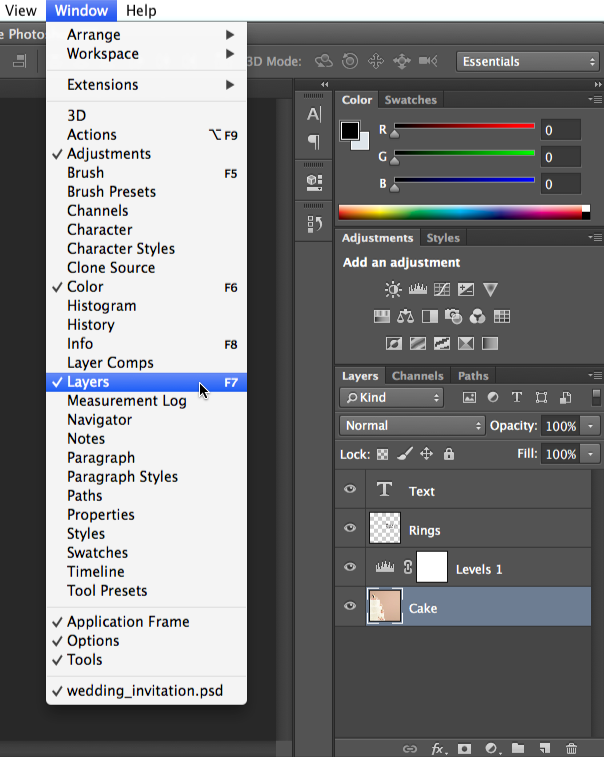
To create an adjustment layer:
If you've never used layers before, we recommend trying adjustment layers first. Remember, an adjustment layer does not contain content—it simply allows you to apply adjustments to the layers below it.
- In the Layers panel, select the layer below where you want the adjustment layer to appear. In our example, we'll select the Cake layer.
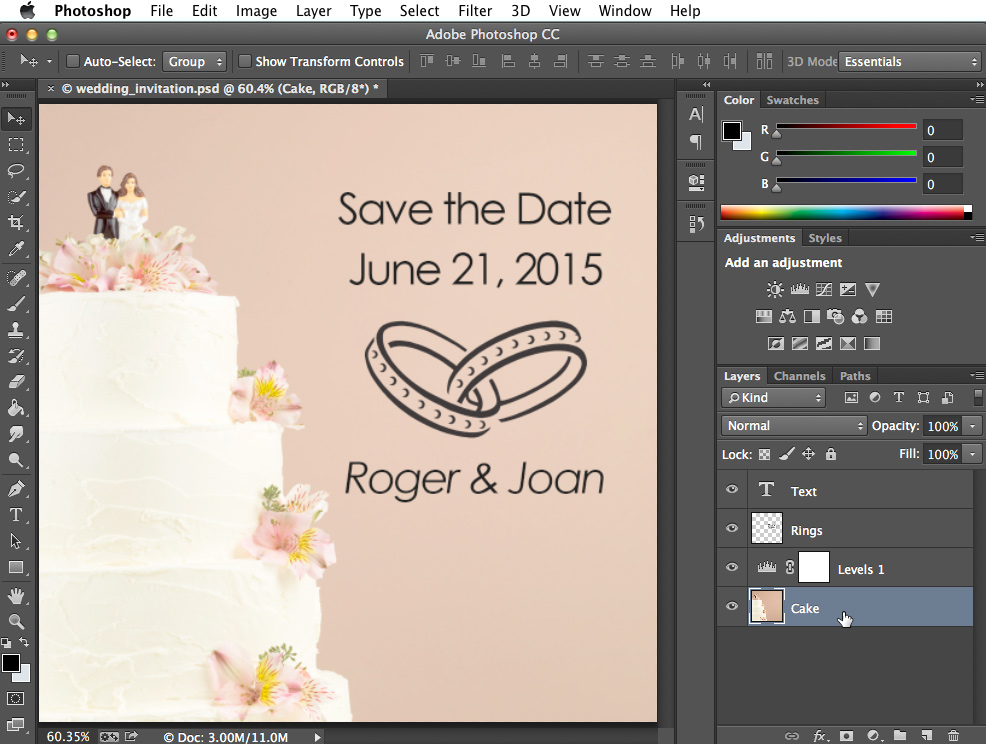
- Click the Adjustment button
 at the bottom of the Layers panel, then choose the desired adjustment.
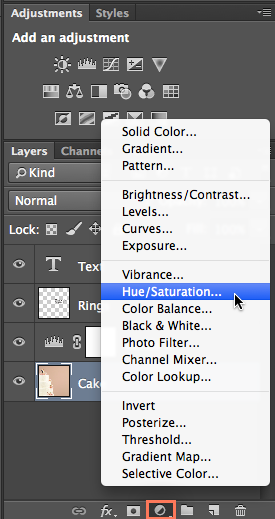
- The adjustment layer will appear, and you can then customize the adjustment in the Properties panel. Any changes you make will affect every layer below the adjustment layer. We'll talk more about using the Properties panel for different adjustments throughout this tutorial.
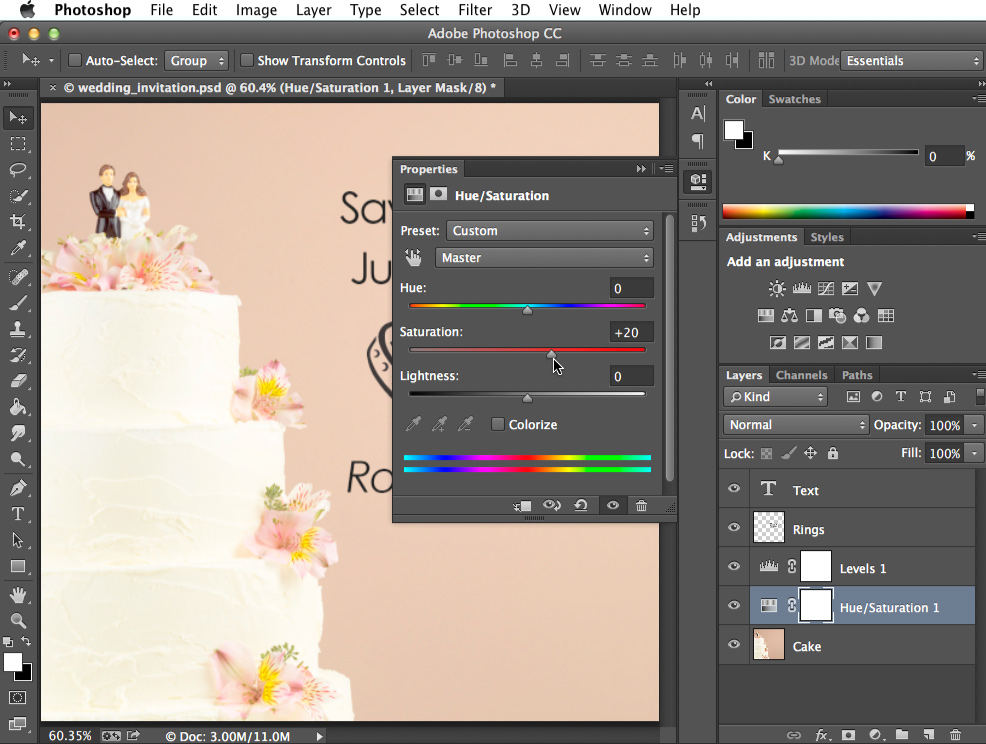
Alternatively, you can use the buttons in the Adjustments panel to create an adjustment layer.
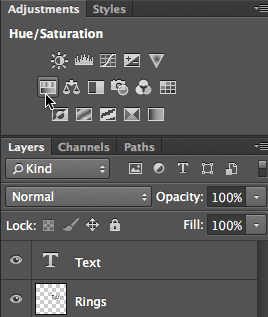
In the example file, select the Cake layer, then create a Hue/Saturation adjustment layer. Try using the sliders in the Properties pane to see the effect.
To create a blank layer:
There may be times when you'll want to create a new, blank layer. For example, if you want to draw on an image with the Brush tool, you could create a new layer and then draw on that layer.
To create a new layer, click the New Layer button  near the lower-right corner of the Layers panel. The new layer will appear in the Layers panel.
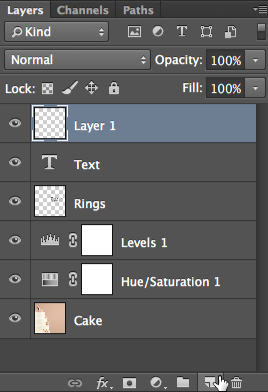
To duplicate a layer:
There will also be times when you'll want to duplicate an existing layer. This is an easy way to try out different edits without altering the original layer.
- Right-click the layer, then select Duplicate Layer.
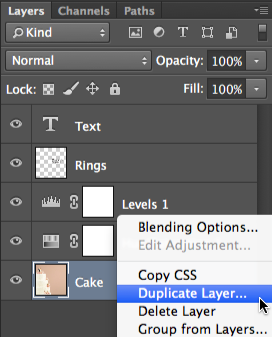
- A dialog box will appear. Click OK. The duplicate layer will appear.
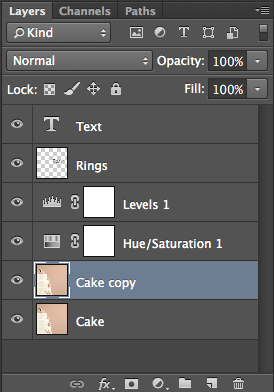
To delete a layer:
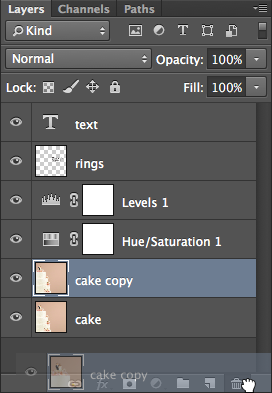
If you find that you no longer need a layer, you can delete it. To do this, simply select the layer and then press the Delete key on your keyboard. Alternatively, you can click and drag the layer to the Trash Can ![]() in the lower-right corner of the Layers panel.
in the lower-right corner of the Layers panel.
Working with layers
There are many different ways to work with the layers in your document. For example, you can show and hide different layers, change the stacking order, and more.
Showing and hiding layers
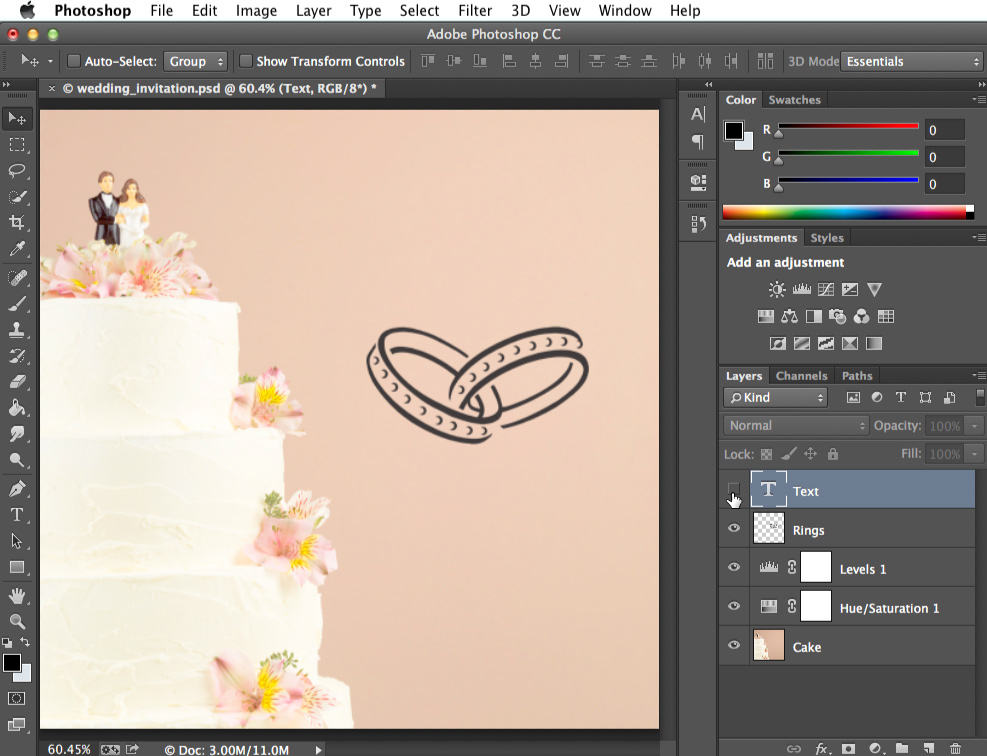
To hide a layer, simply click the eye icon ![]() next to the desired layer. Click it again to show the layer. In the image below, you can see that we've turned off the Text layer, so the text is no longer visible in the document window:
next to the desired layer. Click it again to show the layer. In the image below, you can see that we've turned off the Text layer, so the text is no longer visible in the document window:
Reordering layers
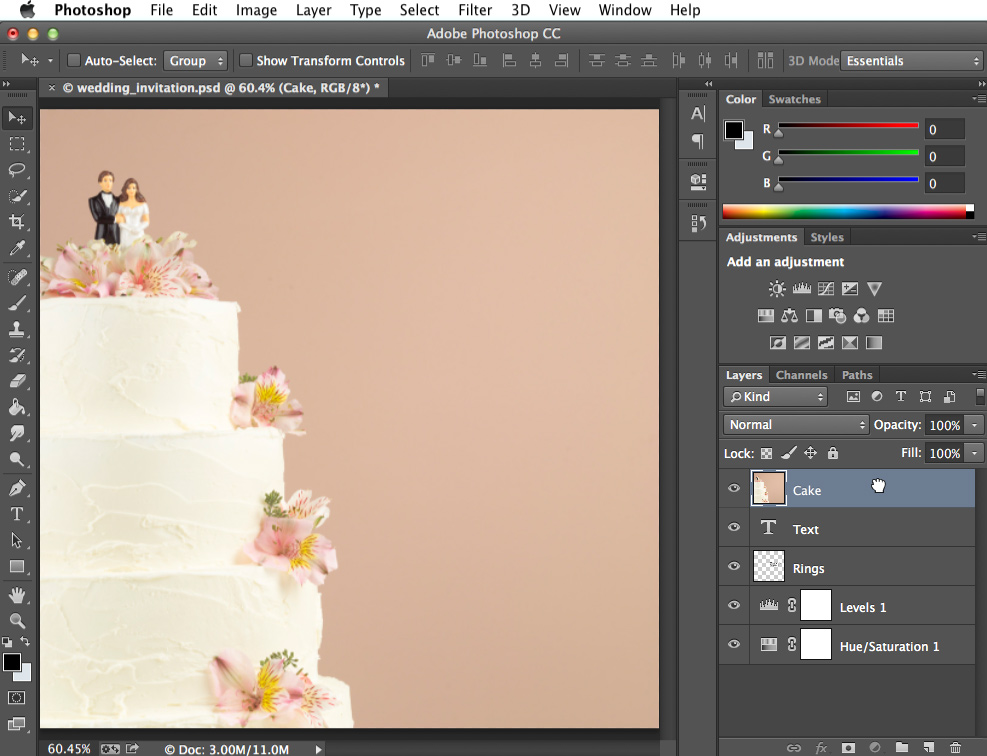
The order in which layers are stacked will determine how the document looks. There may be times when you need to change the stacking order. To reorder a layer, simply click and drag the layer to the desired position in the Layers panel. In the image below, you can see that we've moved the Cake layer to the very top, which completely covers up the layers below it:
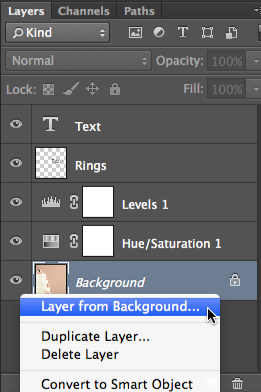
If you want to reorder the Background layer of the image, you will need to right-click it and then select Layer from Background. This will convert the background to a regular layer, which can be reordered.
Try reordering the layers to see the effect. Notice how moving the Cake layer to the very top will completely cover up the other layers, but moving the Text or Rings layer to the top does not.
Letting layers show through
In the example above, moving the Cake layer to the top completely covers up the layers below it. By contrast, moving the Text or Rings layer to the top would still allow parts of the layers below to show through. This is because these layers contain transparent areas, whereas the Cake layer does not.
What if we wanted the layers below the Cake layer to show through? There are many ways to do this, such as changing the opacity of the layer or adding a layer mask. We'll talk more about these options in our lesson on Doing More with Layers.
Editing layers
The true advantage of layers is that you can edit or adjust each layer individually without affecting the rest of the document. As we mentioned earlier, there are several types of layers you can use, along with many editing tools. However, before you get started, note that not all editing tools will work with all types of layers. This will become easier to understand as you gain more experience with Photoshop.
Using editing tools
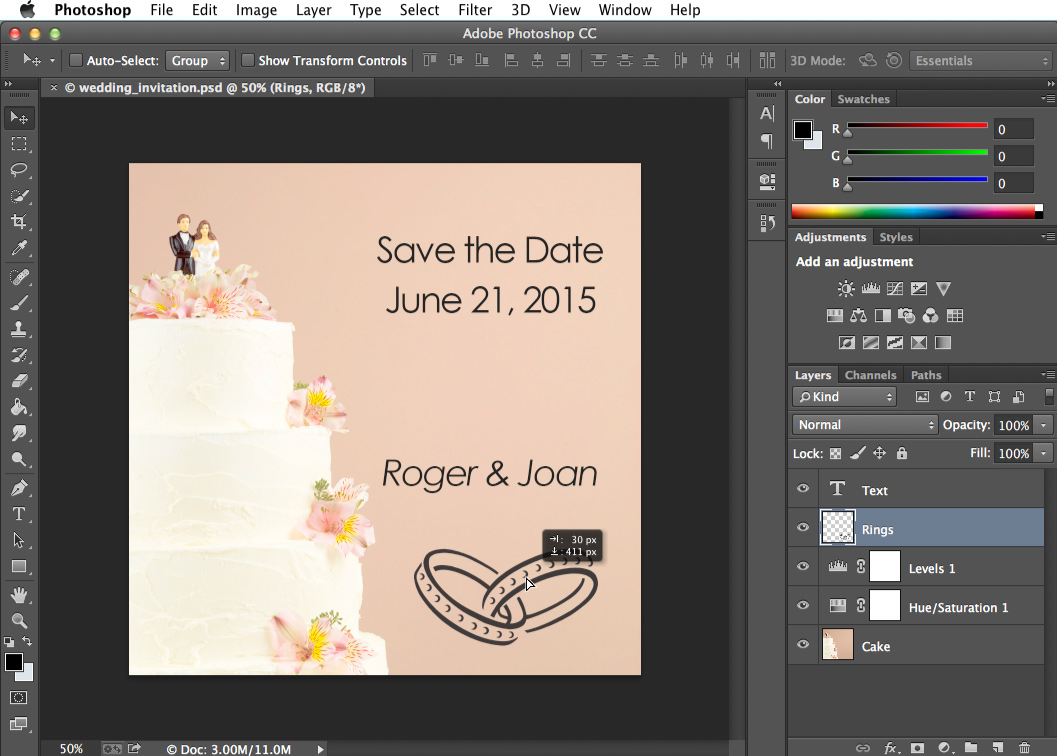
You can use tools from the Tools panel and the Filter menu to edit layers. For example, you could use the Move tool to move different layers around in your document. In the image below, we're using it to move the Rings layer toward the bottom of the image:
Selecting layers before editing
For many types of edits, the desired layer must be selected before editing; otherwise, you may edit the wrong layer by mistake. For example, if you use the Eraser tool, it will only affect the layer you have selected. You should get into the habit of checking the Layers panel frequently to make sure you have the correct layer selected.
Editing text layers
If you want to edit a text layer, you'll need to double-click the layer icon in the Layers panel. You can then change the text, choose a different font, or modify the text size and color.
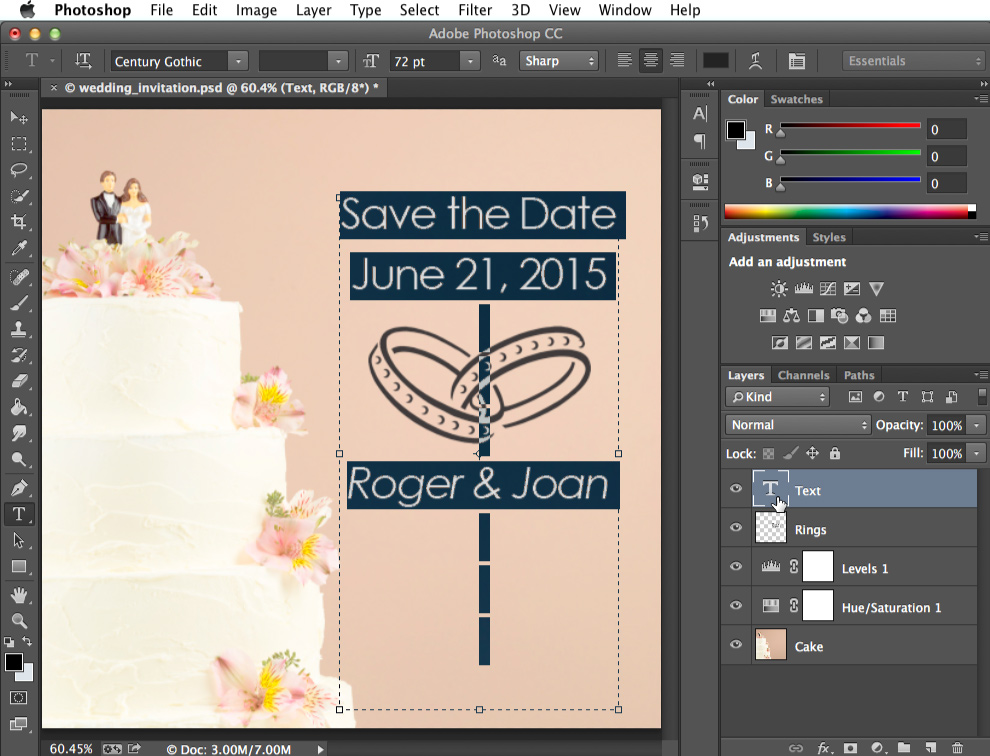
- In the example file, select the Rings layer, then use the Move tool to move the layer around the document.
- Double-click the layer icon for the Text layer, then try editing the text. For example, you could change the date from June 21 to June 15.
While we've covered some fundamental information about layers, it's important to realize that there are many different ways to use layers in Photoshop. We'll talk much more about using layers throughout this tutorial, so you'll be able to build on the skills you've learned in this lesson.
Challenge!
If you'd like to follow along, you can download our example file.
- Open the example file in Photoshop.
- Try turning different layers off and on to see the effect.
- Add a Brightness/Contrast adjustment layer. Then use the sliders in the Properties panel to adjust the brightness and contrast.
- Try re-ordering layers to see the effect.
- Save the image as a PSD file to save your changes. This will preserve all of the layers so you can edit them again later, if desired.
- Use the Save for Web feature to export the image as a JPEG. Make sure to adjust the quality to find a good balance between file size and image quality.


