Word 2010
SmartArt Graphics
Changing the organization of a SmartArt graphic
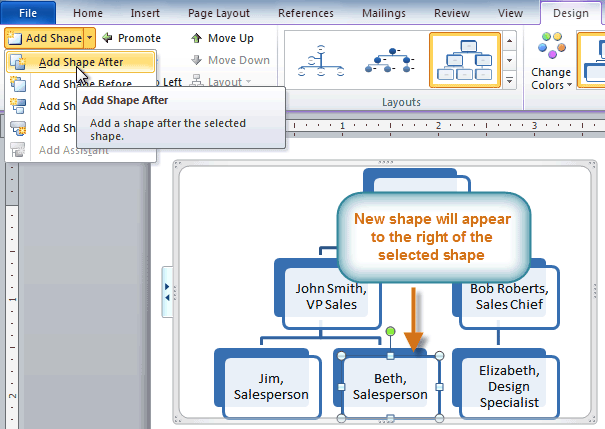
To add a shape to a graphic:
- Select the graphic. The Design and Format tabs appear on the Ribbon.
- Select the Design tab.
- Click the Add Shape command in the Graphics group.
- Decide where you want the new shape to appear, and select one of the shapes nearby the desired location.
- Select Add Shape Before or Add Shape After. If we wanted to add a superior or a subordinate, we could select the Add Shape Above or Add Shape Below options.
 Adding a shape
You can change the layout of a SmartArt graphic even after you've added text. However, if the new layout is different from the old one some of your text may not show up. Experiment with different layouts to see how they display your text differently.
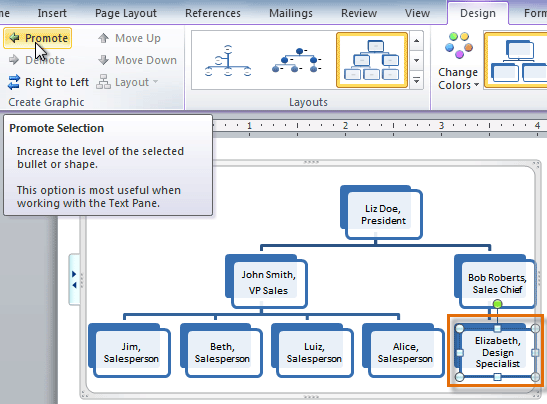
To move shapes using the Promote or Demote commands:
- Select the graphic. The Design and Format tabs appear on the Ribbon.
- Select the Design tab.
- Select the shape you would like to move.
- Click the Promote or Demote command in the Create Graphic group.
 Promoting a shape
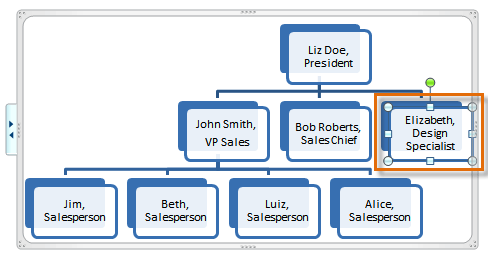
 - The shape will move up or down by one level.
 The promoted shape
You can also demote and promote shapes from within the task pane. With the insertion point in the task pane, press the Tab key to demote a shape. Press the Backspace key (or Shift-Tab) to promote a shape. It's a lot like creating an outline with a multilevel list. For more information, you may want to review the Working with Lists lesson.


