Windows XP
Getting Familiar with the Windows XP Window
Introduction
By the end of this lesson, you should be able to:
- Recognize and use commonly used Windows XP toolbars
- Recognize and use commonly used Windows XP buttons
- Scroll
Windows XP bars and buttons
Windows XP got its name from one its most basic elements: the window. The rectangular work area for a program, file, or other task is called a window.
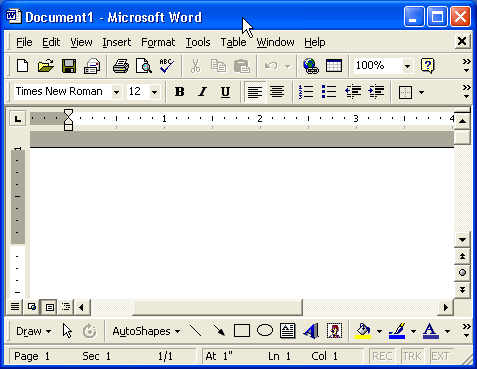
Below is an example of a Microsoft Word window. While Word is a word processing program, the example below features many of the elements common in Windows XP.

The workspace is the white area inside the window. This is where you do your work with a program, such as writing a letter. Depending on what program you're working with, the workspace will appear differently.
More Windows XP bars and buttons
Windows XP offers several tools, menus, and commands that make the operating system easy to use.
The title bar is the horizontal bar at the top of a window. It's displayed as white text on a blue background by default.
The Control menu button is the icon at the far left end of the title bar. The Control menu button opens a menu you can use to control the window.
The Close button is at the far right end of the title bar. It looks like a box with an X in it. Click the Close button to close a window or exit a program. Next to the Close button, you'll see the Minimize and Maximize buttons. Learn more about these buttons in the next lesson.
More Windows XP bars and buttons
The menu bar is the below the title bar. It contains several menus, which let you see a list of commands.
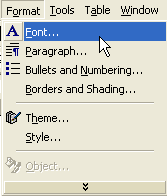
Some menu options are followed by ellipsis, or ... Choosing a menu option followed by an ellipses will open a dialog box, which feature helpful tools to help you perform tasks.

Some Windows XP programs have toolbars across the top of the window. The toolbar buttons allow you to print, cut, paste, and perform other tasks. The options vary depending on the program.

To review taskbar functionality, see Lesson 1.
Scrolling
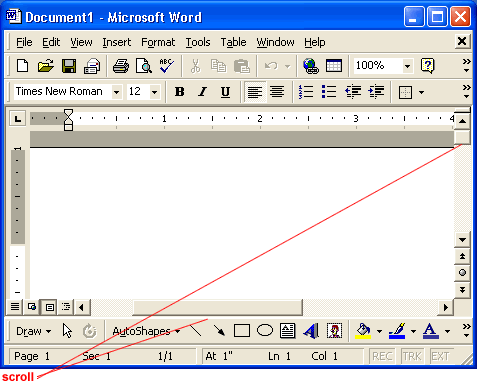
The scroll bar appears at the right side or the bottom of a window when all information in that window cannot be seen at the same time. Use the scroll bar to view hidden information.
The scroll bar features scroll arrows that allow you to move easily through a document. It's especially convenient when viewing a long document.

To scroll:
- Click the
 arrow to scroll up.
 - Click the
 arrow to scroll down.
 - Click the
 arrows to scroll up one page at a time.
 - Click the
 arrows to scroll down one page at a time.
 - Click the
 button to open a browse menu.
OR
- Click and drag the scroll bars to view your document.
Challenge!
- Click Start.
- Choose All Programs
 Accessories
  Notepad.
 - Choose File from the menu bar.
- While holding down the left mouse button, move the mouse pointer over the other menus (Edit, View, etc.) to view their drop-down menus.
- Choose Format
 Font to open the Font dialog box.
 - Close the Font dialog box.