Publisher 2003
Formatting a Table
Formatting tables
Watch the video! (6:46 min)
Once you insert a table in your document, you may want to apply additional formatting to make it stand out or read more clearly. Publisher allows you to change the background color of cells, add borders, resize rows and columns, and add or delete rows or columns.
To change the fill color of a table cell:
- Click inside a table cell to select it, or click and drag to select multiple cells.
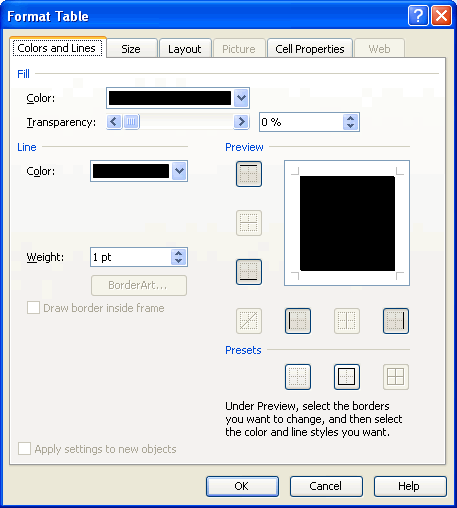
- Right-click the selection and choose Format Table from the context menu. The Format Table dialog box will appear.

- Select the Colors and Lines tab.
- Choose a color in the Fill section. Select no fill to keep the background blank.
- Click OK.
To add borders to table cells:
- Select Format
 Table from the main menu. The Format Table dialog box appears.
 - Select the Colors and Lines tab.
- In Line:
- Choose a line color.
- Select a line weight.
- Click the various line icons to show or hide lines in your table. You can also select one of the presets.
To change row height and cell width:
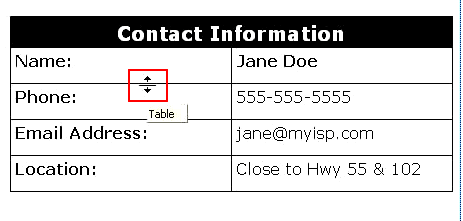
- Move your mouse over the row or column line you want to adjust. The double arrow cursor will appear.
- Click and drag to make the row or column larger or smaller.

To add or remove rows or columns:
- Select the row or column in your table next to where you want to insert a new one.
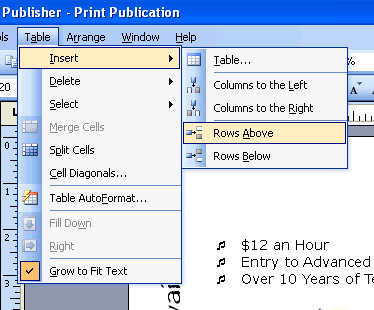
- Select Table
 Insert on the main menu.
 - Select an option from the list.
- To delete a row or column, select it, right-click your mouse, and select Delete.


