PowerPoint 2007
Text Basics
Introduction
 It is important to know how to perform basic tasks with text when working in PowerPoint. In this lesson, you will learn the basics of working with text, including how to insert, delete, select, and move text, as well as how to work with text boxes.
Text Basics
Watch the video! (Part 1) (6:06min) (Part 2) (5:39min)
Download the example to work along with the video.
In PowerPoint, you can insert text into placeholders or text boxes. Text in both can be formatted using the same commands.
To insert text:
- Click the placeholder or text box where you wish to insert text. The insertion point will appear. If you are working with a placeholder, placeholder text will disappear.
- Type the text you wish to appear.
To delete text:
- Place your cursor next to the text you wish to delete.
- Press the Backspace key on your keyboard to delete text to the left of the cursor.
- Press the Delete key on your keyboard to delete text to the right of the cursor.
To select text:
- Place the insertion point next to the text you wish to select.
- Click and drag your mouse over the text to select it.
- Release the mouse button. You have selected the text. A highlighted box will appear over the selected text.
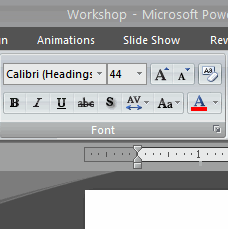
When you select text or images in PowerPoint, a hover toolbar with formatting options appears. This makes formatting commands easily accessible, which can save you time.
To format font size:
- Select the text you wish to modify.
- Click the drop-down arrow next to the font size box on the Home tab. The font size drop-down menu appears.
- Move your cursor over the various font sizes. A live preview of the font size will appear in the document.
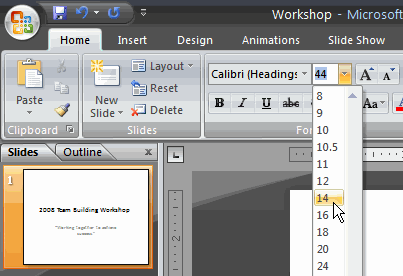
- Click the font size you wish to use. The font size will change in the document.
To format font style:
- Select the text you wish to modify.
- Click the drop-down arrow next to the font style box on the Home tab. The font style drop-down menu appears.
- Move your cursor over the various font styles. A live preview of the font will appear in the document.
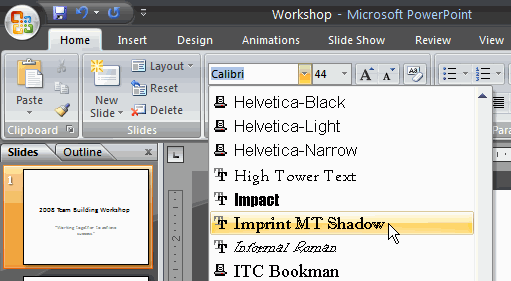
- Click the font style you wish to use. The font style will change in the document.
To format font color:
- Select the text you wish to modify.
- Click the drop-down arrow next to the font color box on the Home tab. The font color menu appears.
- Move your cursor over the various font colors. A live preview of the color will appear in the document.
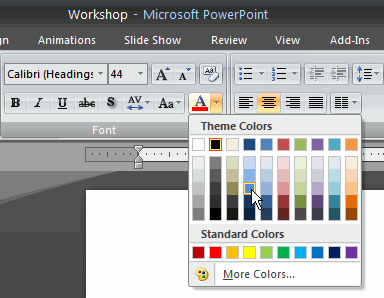
- Click the font color you wish to use. The font color will change in the slide.
Your color choices aren't limited to the drop-down menu that appears. Select More Colors at the bottom of the list to access more color choices.
Text Basics
To use the Bold, Italic, and Underline commands:
- Select the text you wish to modify.
- Click the Bold, Italic, or Underline command in the Font group on the Home tab.

Click the command again to remove the formatting.
Other font commands
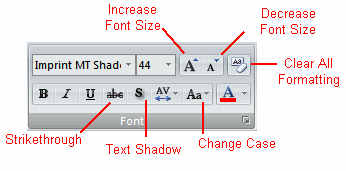
The Increase Font Size command increases the font size of the selected text to the next standard font size.
The Decrease Font Size command decreases the font size of the selected text to the next standard font size.
The Clear All Formatting command removes your recent formatting changes.
The Strikethrough command makes a line through the text.
The Text Shadow command adds a drop shadow to text.
The Change Case commands lets you try different capitalization options without having to delete and retype letters or words.
To change text alignment:
- Select the text you wish to modify.
- Select one of the four alignment options from the Paragraph group on the Home tab.
- Align Text Left: Aligns selected text to the left margin
- Center: Aligns text an equal distance from the left and right margins
- Align Text Right: Aligns selected text to the right margin
- Justify: Lines up equally to the right and left margins

The alignment commands align text within the placeholder or text box where it is located, rather than across the slide.
Text boxes
In addition to inserting text in placeholders, you can insert text into text boxes. Text boxes allow you to add to predefined layouts so you can place text wherever you want on a slide.
To insert a text box:
- Select the Insert tab on the Ribbon.
- Click the Text Box command in the Text group.
- Click and drag the cursor until the text box is the desired width.
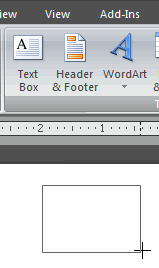
- Release the mouse button.
To move a text box:
- Click the text box. Your cursor becomes a cross with arrows on each end.
- While holding the mouse button, drag the text box to the desired location on the page.
- Release the mouse button.
To resize a text box:
- Select the text box.
- Click one of the square sizing handles on the left or right sides, or a circular handle on one of the four corners.
- While holding down the mouse button, drag the sizing handle until the text box is the desired width.
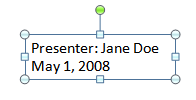
Click and drag the green circle to rotate the text box.
Moving text
To copy and paste text:
- Select the text you wish to copy.
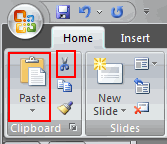
- Click the Copy command on the Home tab.
- Place your insertion point where you wish the text to appear.
- Click the Paste command on the Home tab. The text will appear.
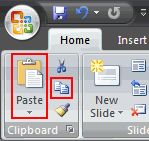
To cut and paste text:
- Select the text you wish to cut.
- Click the Cut command on the Home tab.
- Place your insertion point where you wish the text to appear.
- Click the Paste command on the Home tab. The text will appear.
To drag and drop text:
- Select the text you wish to copy.
- Click your mouse and drag the text to the location you wish it to appear. The cursor will have a text box beneath it to indicate that you are moving text.
- Release the mouse button, and the text will appear.
Challenge!
Use the Workshop presentation or any other PowerPoint presentation you choose to complete this challenge.
- Insert text on a slide.
- Practice using the Bold, Italic, and Underline commands.
- Change the font style of the title.
- Change the font size of the title.
- Change the color of the subtitle.
- Use the Change Case command on a slide title.
- Practice using the Increase Font Size and Decrease Font Size commands.
- Insert a text box, and add text.


