Microsoft Account
Creating a Microsoft Account
Setting up your profile
Once you've set up your Microsoft account and become familiar with the toolbar, you might want to customize and add information to your personal profile.
As you learned in Lesson 1, your profile is a personal information page linked to your Microsoft account. Your profile can contain:
- Basic information, like your birth date and gender
- Additional contact information
- Personal information about your work, social life, and education
- Connections to social networking sites like Facebook
Filling in your profile is completely optional, and it's advisable not to add too much detailed personal information. However, filling in a little information can be useful in some situations. It's all about deciding how much you want to share.
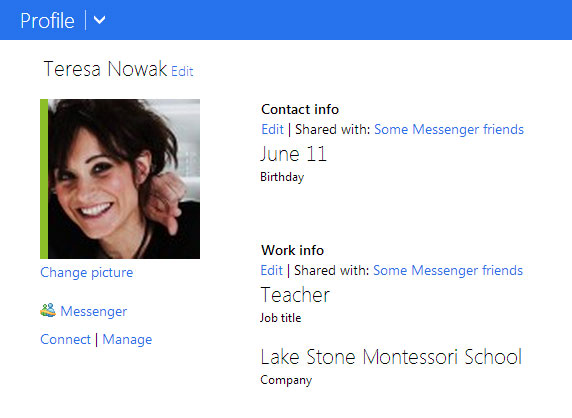 A profile with minimal information
To learn more about what personal information it's safe to include in your profile, check out our lesson on Smart Social Networking and Communication Tips.
- To access and edit your profile, click the profile icon in the upper-right corner, then select Edit profile from the drop-down menu.
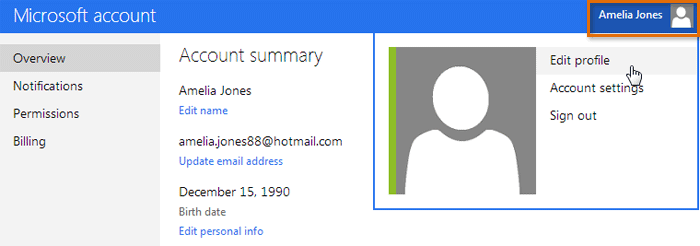 Accessing the profile page
To add a profile picture:
- Navigate to your profile page, then locate and select Change picture.
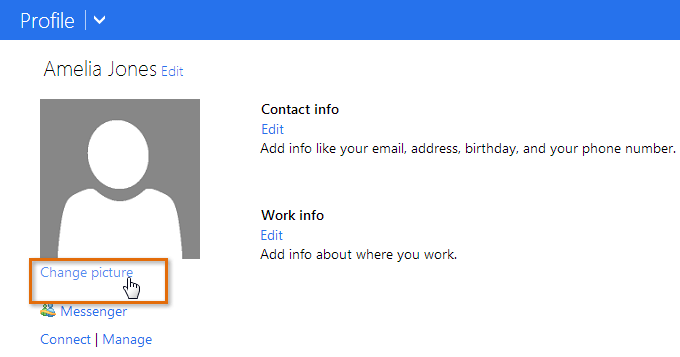 Changing a profile picture
 - The profile picture page will appear. Click the Choose File button.
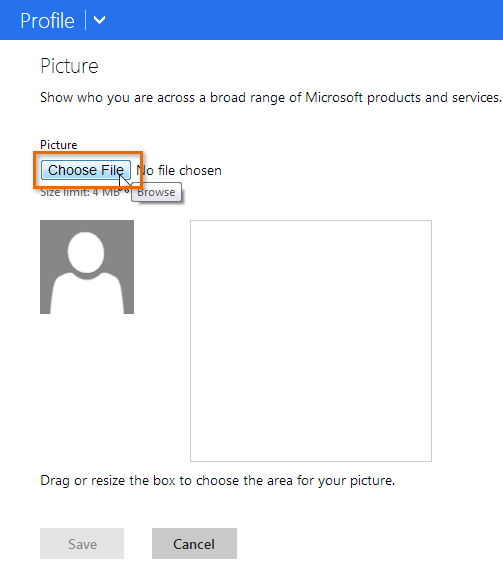 Clicking Choose File
 - A dialog box will appear. Locate and select the desired picture, then click Open.
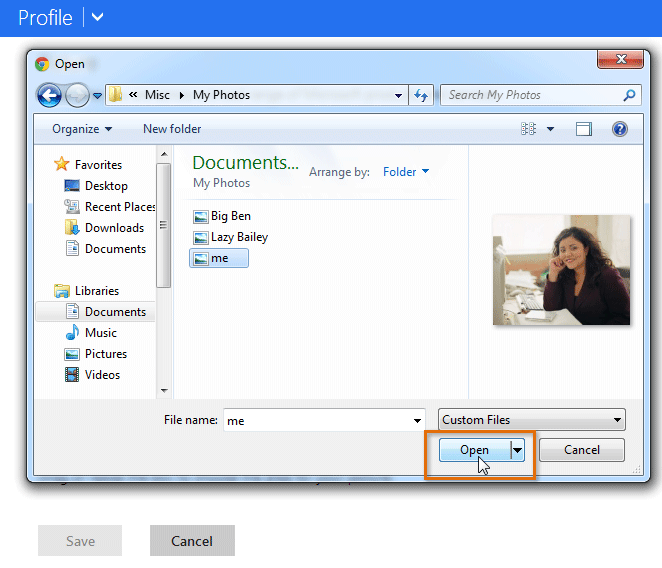 Selecting a profile picture
 - Your picture will appear. If you want, you can drag and resize the box to crop your image. As you crop your picture, a preview of the cropped image will appear to the left.
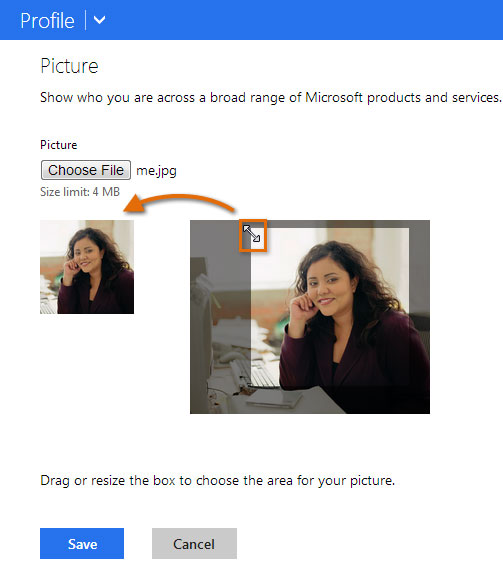 Cropping the picture
 - When you are satisfied with the cropped picture, click Save. Your profile picture will be saved.
 Saving the profile picture


