Image Editing 101
Printing Photos
Photo-printing tips
To ensure your prints look as good as possible, you may want to take a moment to make a few final adjustments to your photos. Below are some tips you can use to get better results.
Use JPEG images
As we mentioned in the first lesson of this tutorial, the JPEG format is commonly used for photographs. Many photo-printing services will require your images to be JPEGs. If your images aren't already using this format, you will likely need to save new JPEG versions before printing. We recommend using the highest-quality setting when saving a JPEG for printing.
Use high-resolution images
As discussed earlier in this tutorial, the higher the resolution, the more detail an image will have. This is especially important when printing because the resolution of a printed image is much higher than the resolution of your computer screen. So even though an image might look perfectly clear on your computer, it may not look good when printed. Most photo-printing services suggest that your images have resolution of at least 300DPI (dots per inch). If your photo has a lower resolution, it may look blocky, or pixelated, when printed.
Most modern digital cameras take large, high-resolution images that will meet this requirement. However, you should not expect an image you've downloaded from the web (or any image that's been previously resized) to have a high resolution. If you've already saved a smaller version of a photo to share on the web, you'll want to use the original, full-resolution version of the image for printing.
Many photo-printing services will warn you if an image doesn't meet the recommended resolution for the selected print size.
Adjust cropping if necessary
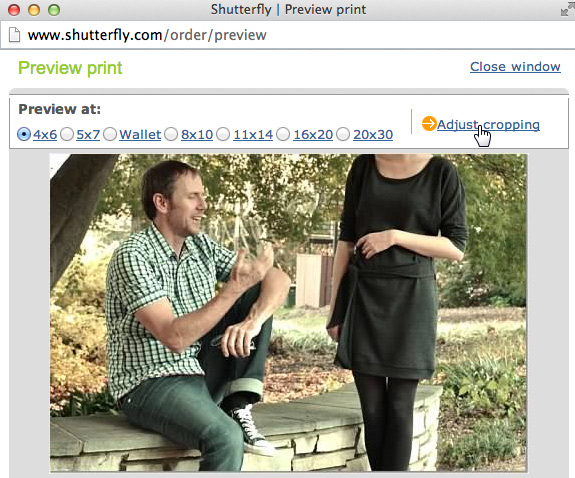
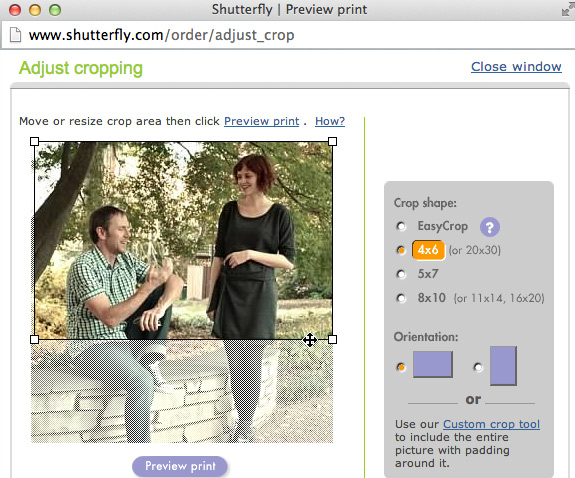
If your photo has a different aspect ratio from the print size you've selected, your images will be automatically cropped to fit the print size, which can lead to unexpected results. For example, if you request a 4" × 6" print of a square image, important parts of the image may be cropped out. In the example below, you can see that one person's head has been completely cropped out of the image:

Fortunately, almost every service will allow you to preview and adjust the crop before ordering your prints.

Advanced printing tips
If you're looking for even better results, here are some other tips you may want to consider:
- Print a test copy: It's important to realize that a printed photo may look a bit different than it did on your computer screen. If you're ordering several prints of the same photo or a large, expensive print, you may want to print a test copy of your image first. An inexpensive 4" × 6" print will let you see whether the photo looks the way you want, and you can then make adjustments before ordering the final prints.
- Sharpen: If you want your prints to look extremely crisp and clear, you can apply more sharpening than you normally would. If the images look over-sharpened on your computer, don't worry—they'll lose a little bit of sharpness in the printing process, which means the printed versions will look correct. You can review our lesson on Fixing Common Problems to learn more about sharpening.
- Check your printer's settings: If you're printing at home, be sure to check your printer's settings. Many printers have a special photo-printing mode you can use for better results. Some printers also allow you to specify the type of paper you are using (such as glossy or matte), and they will optimize the printing for that type of paper.
It's important to keep in mind that there's no formula for printing a perfect photo. Even small details, like the adjustments you make or the print size you choose, can have a big impact on the final result. But with a little practice and by following the tips above, you'll be able to get consistent, good-looking prints.


