Gmail
Sending Email
Introduction
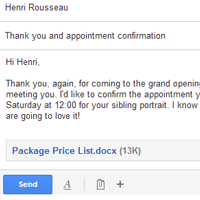
Now that you've created a Gmail account, you can start sending email messages. Writing an email can be as simple as typing a message, or you can use text formatting, attachments, and a signature to customize your message.
In this lesson, we'll show how to compose an email, add an attachment, and create a signature that will appear on all of the messages you send.
Sending email
When you write an email, you'll be using the compose window. This is where you'll add the email address of the recipient(s), the subject, and the body of the email, which is the message itself. You'll also be able to add various types of text formatting, as well as one or more attachments. If you want, you can even create a signature that will be added to the end of every email you send.
Watch the video to learn how to compose and send an email.
The compose window
Click the buttons in the interactive below to learn about the different parts of the compose window.
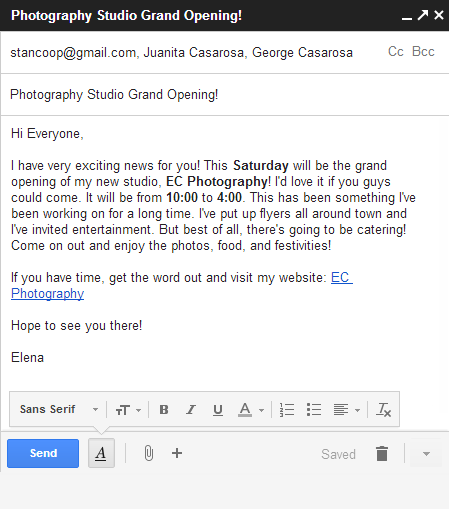
Send Button
When you are satisfied with your message, click Send to send it to the recipients.
Formatting Options
Click the Formatting button to access formatting options.
Formatting allows you to change the look and feel of your message. For example, you can change the font style, size, and color, and include links.
Add Attachment
An attachment is a file (such as an image or a document) that is sent along with the email message. Gmail allows you to include multiple attachments.
Click the Attachment button to include an attachment with the email.
Body
The body is the actual text of the email.
Generally, you'll write this just like a normal letter, with a greeting, one or more paragraphs, and closing with your name.
Subject
The subject should say what the email is about.
Keep the subject brief, but give the recipients a reasonable idea of what's in the message.
Cc and Bcc
Cc stands for "carbon copy." This is used when you want to send an email to someone who is not the main recipient. This helps to keep that person "in the loop" while letting them know that they probably don't need to reply to your message.
Bcc stands for "blind carbon copy." It works almost the same way as Cc, except all of the email address in the Bcc fields are hidden, making it ideal when emailing a very large number of recipients or when privacy is needed.
Recipients
Recipients are the people you are sending the email to. You will need to type the email address for each recipient.
Most of the time, you'll add recipients to the To: field but you can also add recipients to the Cc: or Bcc: fields.
To send an email:
- In the left menu pane, click the Compose button.
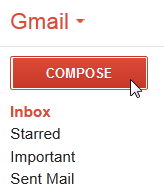 Composing a new email
 - The compose window will appear in the lower-right corner of the page.
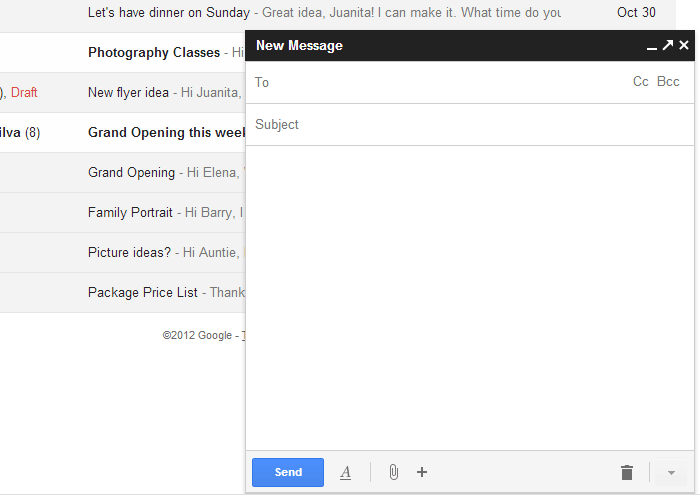 The compose window
 - You'll need to add one or more recipients to the To: field. There are two ways to do this:
- Type one or more email addresses, separated by commas.
 Typing several email addresses
- Click To to select recipients from your contacts, and then click Select.
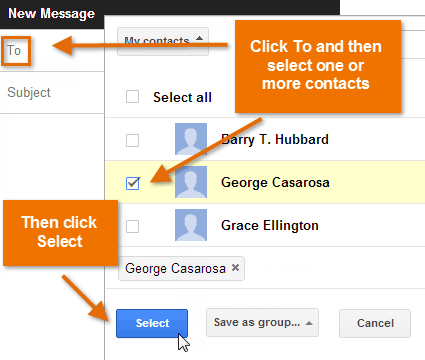 Selecting recipients from contacts
- Type one or more email addresses, separated by commas.
- Type a Subject for the message.
- In the Body field, type your message. When you're done, click Send.
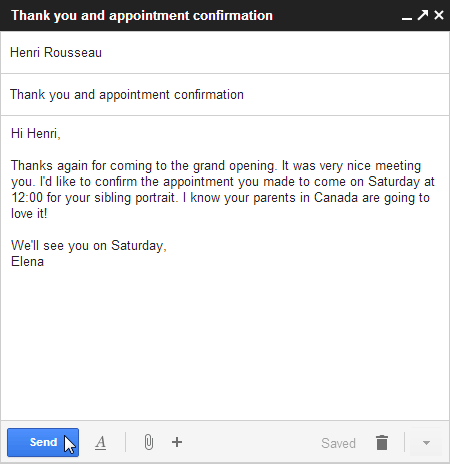 Typing a subject and body and sending an email
If the person you are emailing is already one of your contacts, you can start typing that person's first name, last name, or email address, and Gmail will display the contact below the To: field. You can then press the Enter key to add the person to the To field.
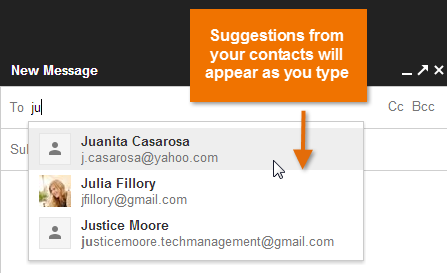 Adding an existing contact as a recipient
Adding attachments
An attachment is simply a file (such as an image or document) that is sent along with your email. For example, if you are applying for a job, you might send your resume as an attachment, with the body of the email being the cover letter. It's a good idea to include a message in the body of your email explaining what the attachment is, especially if the recipient isn't expecting an attachment.
Remember to attach your file before you click Send. Forgetting to attach a file is a surprisingly common mistake.
To add an attachment:
- While composing an email, click the paperclip icon at the bottom of the compose window.
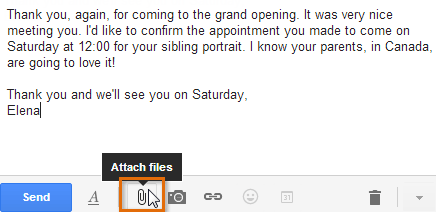 Attaching a file
 - The File Upload dialog box will appear. Choose the file you want to attach and click Open.
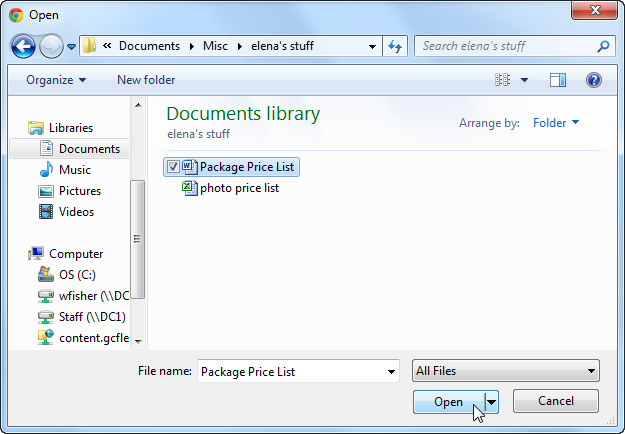 Choosing a file to attach
 - The attachment will begin to upload. Most attachments will upload within a few seconds, but larger ones can take longer.
 Uploading the attachment
 - When you're ready to send your email, click Send.
You can click Send before the attachment finishes uploading. It will continue to upload, and Gmail will automatically send the email once it's done.
Email formatting
Gmail allows you to add various types of formatting to your text.
- Click the Formatting button at the bottom of the compose window to see different formatting options.
 Clicking the Formatting buttons
Click the buttons in the interactive below to learn about different formatting options in Gmail.
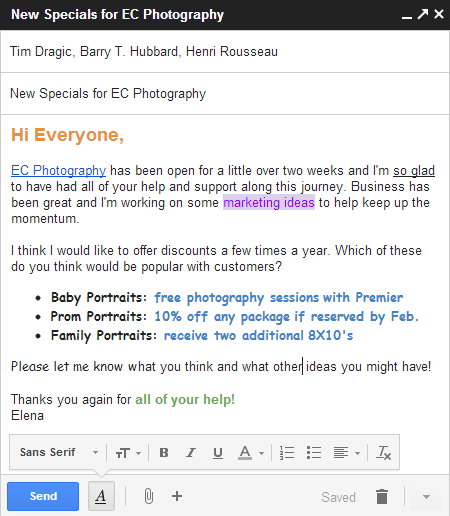
Bullets and Lists
You can organize text into a list of information using bullets or numbers.
This can help to emphasize each item in the list and distinguish it from the rest of the email.

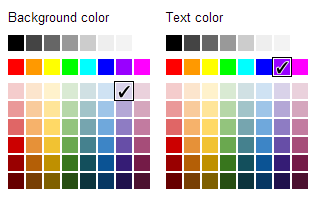
Text and Background Color
If you want to add a little excitement to an informal email, you can change the text and background color for certain words.
Avoid using light colors, as they may be hard to read against a white background.
Font Size
Most of the time, you'll probably want to use the Normal font size, but sometimes you may want to try a different size for contrast.
Be careful not to overuse this feature; extremely small or large fonts can make your emails difficult to read.

Font Style
Gmail has several font styles to choose from. You can change the font style for the entire email or just change a few words to create contrast.
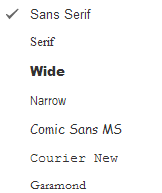
Bold, Italic, Underline
You can emphasize text by making it bold, italic, or underlined.
![]()
Remove Formatting
If you want to remove any formatting from the message, select the desired text and then click the Remove Formatting button.
Alignment
If you choose, you can also modify the alignment of the text in your message.

Plus Button
Click the Plus button to see additional options, like including a photo or a hyperlink in your message.
![]()
For more serious emails, such as job applications, you should be careful not to add formatting that would seem too informal, such as bright colors or emoticons.
Adding a signature
A signature is an optional block of text that appears after every email you send. By default, Gmail does not include a signature, but it's easy to create one. It will typically include your name and some contact information, like your phone number or email address. If you're using Gmail at work, you may want to include your title and your company's address or website.
- Click the gear icon in the top-right corner of the page, and select Settings.
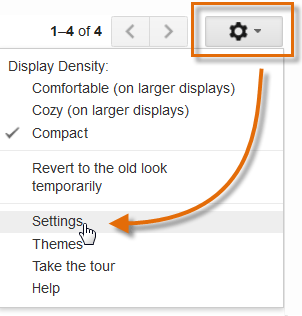 Going to Settings
 - Scroll down until you see the Signature section.
- Type your desired signature in the box. You can also change the font, add other formatting, or insert an image if you want.
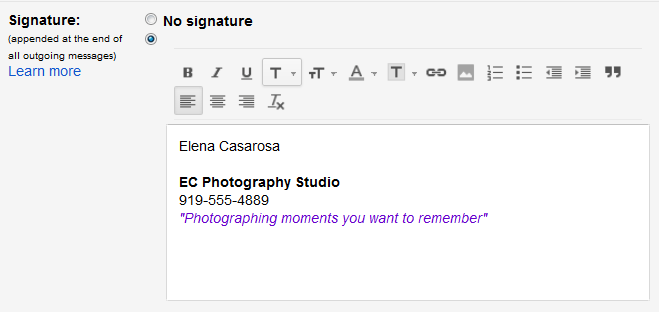 Typing a signature
 - Scroll down to the bottom of the page and click Save Changes.
 Saving the signature
You should keep your signature brief. Instead of listing all of the phone numbers, email addresses, and mailing addresses where you can be reached, just list the most important ones.
Keep in mind that your signature will be seen by many different people, so you may not want to include your home address or anything too personal. Even if you only email people you know, someone can still forward your email to someone else, which can reveal your signature to even more people.


