Access 2013
Creating Forms
Customizing form settings with the Property Sheet
The Property Sheet is a pane containing detailed information about your form and each of its components. From the Property Sheet, you can make changes to every part of your form, both in terms of function and appearance.
The best way to familiarize yourself with the Property Sheet is to open it and select various options. When you select an option, Access will display a brief description of that option on the bottom-left border of the program window.
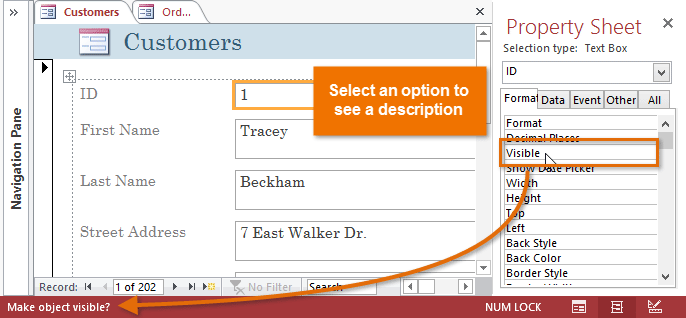 Selecting a Property Sheet option to find out what it does
Pay close attention as you modify your form and its fields. It's possible to make subtle changes with the Property Sheet. Because there are so many options, it can sometimes be difficult to remember which one you used to modify each aspect of your form.
Modifying form settings
There are far too many options in the Property Sheet to discuss them all in detail. We'll review two useful ones here: hiding fields, and setting fields with dates to automatically fill in the current date. Practicing these procedures should also give you a sense of how to work with other Property Sheet settings.
To hide a field:
- In either Layout or Design view, select the Design tab, then locate the Tools group. Click the Property Sheet command.
 Clicking the Property Sheet command
 - The Property Sheet will appear in a pane on the right. On the form, select the field you wish to hide. In our example, we'll hide the Customer ID field because we don't want any of our users to try to edit it.
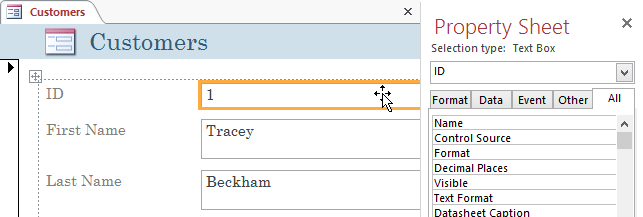 Selecting the field we wish to hide
 - In the Property Sheet, click the All tab, then locate the Visible option on the fifth row.
- Click the drop-down arrow in the column to the right, then select No.
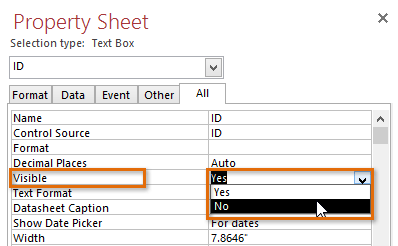 Selecting "No" from the drop-down list in the Visible option
 - Switch to Form view to verify that the field is hidden.
To set a field to autofill with the current date
- In either Layout or Design view, select the Design tab, then locate the Tools group. Click the Property Sheet command.
- The Property Sheet will appear in a pane on the right. On the form, select the field you would like to automatically fill in the current date. This must be a field with the date data type. For our example, we'll select the Pickup Date field on our Orders form.
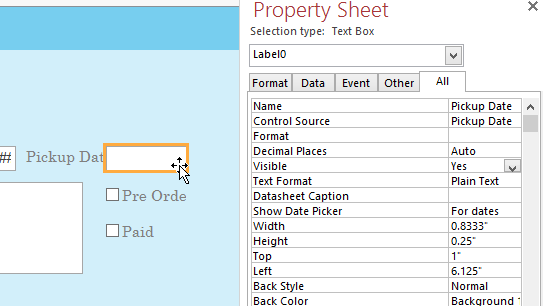 Selecting the Pickup Date field
 - In the Property Sheet, click the Data tab, then select the Default Value field in the fourth row. Click the Expression Builder button that appears in the column to the right.
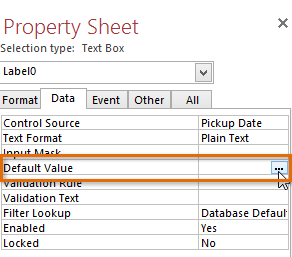 Clicking the Expression Builder button for the Default Value option
 - The Expression Builder dialog box will appear. In the Expression Elements list, click the words Common Expressions.
- In the Expression Categories list, double-click Current Date.
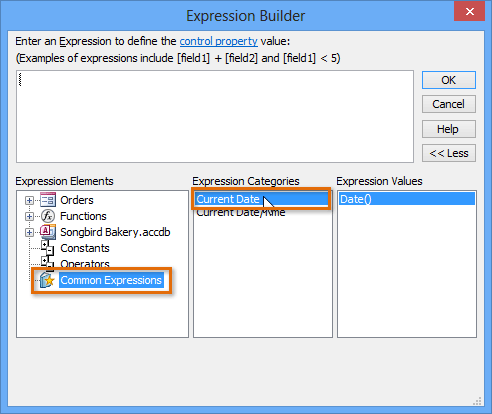 The Expression Builder dialog box
 - The expression for Current Date will be added. Click OK.
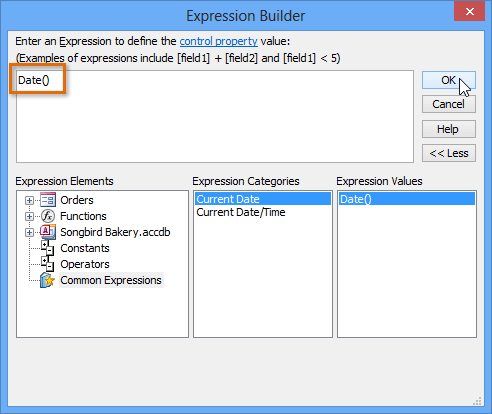 The Current Date expression
 - Switch to Form view to verify that the expression works. When you create a new record with that form, the date field you modified will automatically fill in the current date.
 The current date is automatically entered into the Pickup Date field when a new record is created


