Access 2010
Creating Forms
Adding Design Controls
Design Controls set restrictions on the fields in your forms. This helps you better control how the data is entered into your forms, which in turn helps keep the database consistent.
Combo boxes
A combo box is a drop-down list you can use in your form in place of a field. Combo boxes limit the information users can enter by forcing them to select only the options you have specified.
Combo boxes are useful for fields that have a limited number of possible valid responses. For instance, you might use a combo box to ensure people only enter a valid U.S. state while entering an address, or that they only choose products that already exist in your database while placing an order.
To create a combo box:
- In Form Layout view, select the Form Layout Tools Design tab, and locate the Controls group.
- Select the Combo Box command, which looks like a drop-down list.
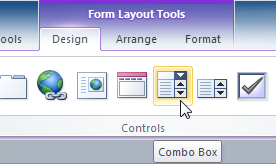 The Combo Box command
 - Your cursor will turn into a tiny crosshairs and drop-down list icon
 . Move the cursor to the place where you would like to insert the combo box, and click. A yellow line will appear to indicate the location where your combo box will be created.
In our example, the combo box will be located between the City field and the Add to Mailing List? field. Selecting the location of the new combo box
 - The Combo Box Wizard dialog box will appear. Select the second option, I will type in the values that I want, then click Next.
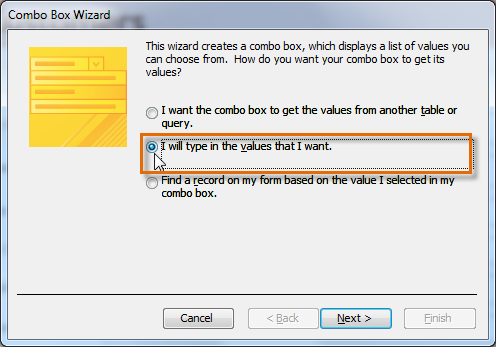 The Combo Box Wizard dialog box
 - Type in the choices you would like to appear in your drop-down list. Each choice should be on its own row.
In our example, we are creating a combo box for the Add to Mailing List? field in our form, so we will enter all of the possible valid responses for that field. Users will be able to select one of three choices from our finished combo box: "No", "Yes-Weekly", and "Special Offers Only".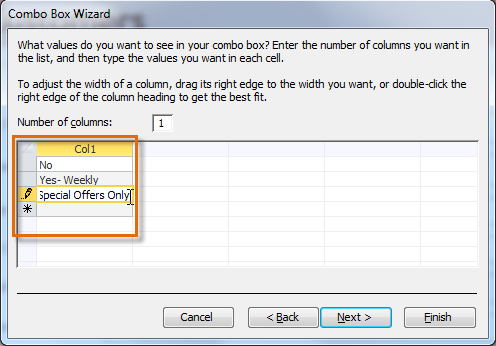 Choosing how many columns to include in the combo box's drop-down list, and typing the options that will appear in that list
 - If necessary, resize the column so all of your text is visible. Once you are satisfied with your list, click Next.
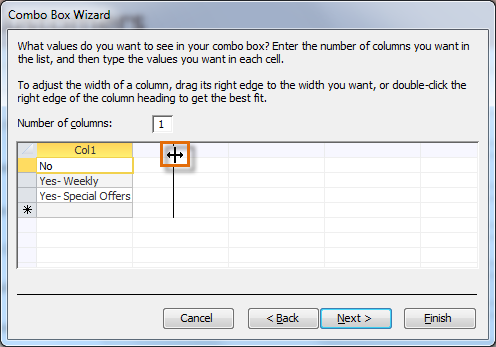 Resizing the column that will appear in the combo box
 - Select Store that value in this field, then click the drop-down arrow and select the field where you would like selections from your combo box to be recorded. After making your selection, click Next.
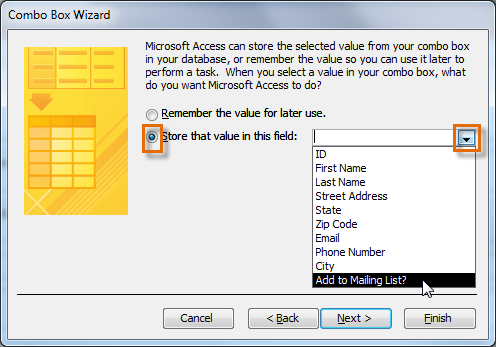 Selecting the field that will be affected by the combo box—choices made while using the combo box will be recorded in this field
 - Enter the label, or the name that will appear next to your combo box. Generally, it's a good idea to use the name of the field you chose in the previous step.
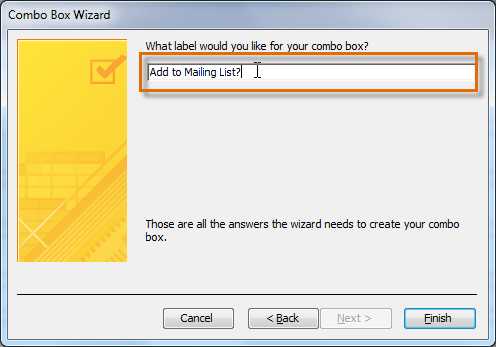 Naming the combo box
 - Click Finish. Your combo box will appear on the form. If you created your combo box to replace an existing field, delete the first field.
In our example, you might notice that we now have two fields with the same name. These two fields send information to the same place, so we don't need them both. We'll delete the one without the combo box.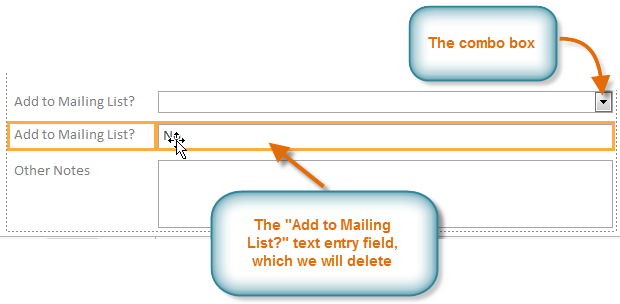 Deleting the field which the combo box replaces
 - Switch to Form view to test your combo box. Simply click the drop-down arrow and verify that the list contains the correct choices. The combo box can now be used to enter data.
 Testing the combo box in Form view
If you want to include a drop-down list with a long list of options and don't want to type them all out, create a combo box and choose the first option in the combo box wizard, I want to get the values from another table or query. This will allow you to create a drop-down list from a table field.
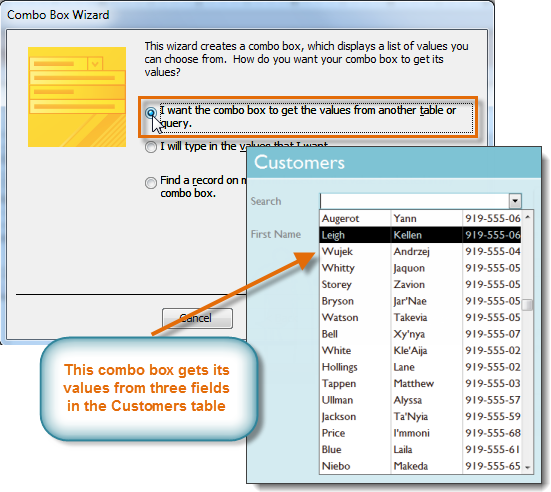 A combo box that takes its values from a table
Some users report that Access malfunctions while working with forms. If you have a problem performing any of these tasks in Layout view, try switching to Design View.


