Word 2010
Working with Headers and Footers
Introduction
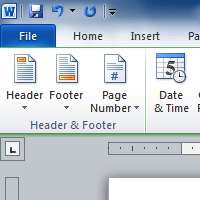
You can make your document look professional and polished by utilizing the header and footer sections. The header is a section of the document that appears in the top margin, while the footer is a section of the document that appears in the bottom margin. Headers and footers generally contain information such as the page number, date, and document name.
In this lesson, you will learn how to insert and edit headers and footers.
Headers and footers
Headers and footers can help keep longer documents organized and make them easier to read. Text entered in the header or footer will appear on each page of the document.
To insert a header or footer:
- Select the Insert tab.
- Click either the Header or Footer command. A drop-down menu will appear.
- From the drop-down menu, select Blank to insert a blank header or footer, or choose one of the built-in options.
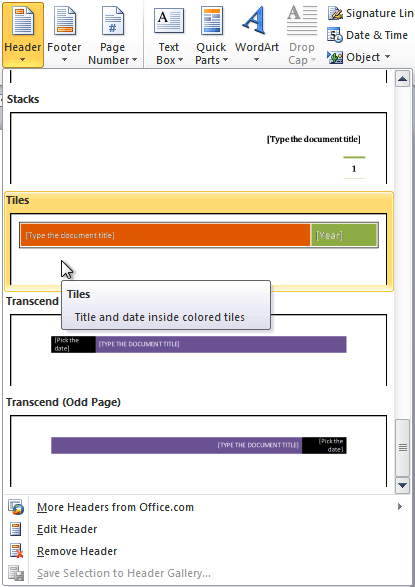 Inserting a header
 - The Design tab will appear on the Ribbon, and the header or footer will appear in the document.
- Type the desired information into the header or footer.
 Typing text into a header
 - When you're finished, click Close Header and Footer in the Design tab, or hit the Esc key.
After you close the header or footer, it will still be visible, but it will be locked. To edit it again, just double-click anywhere on the header or footer, and it will become unlocked.
To insert the date or time into a header or footer:
- Double-click anywhere on the header or footer to unlock it. The Design tab will appear.
- From the Design tab, click the Date & Time command.
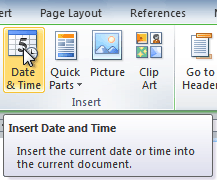 The Date & Time command
 - Select a date format in the dialog box that appears.
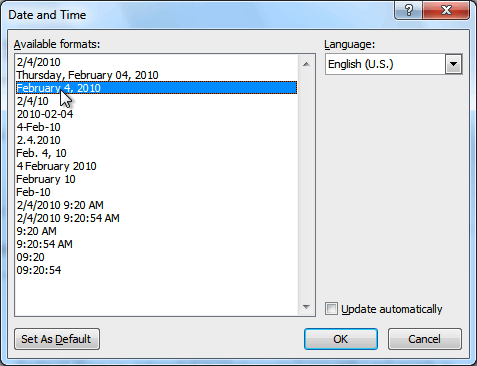 Selecting a date format
 - Place a check mark in the Update Automatically box if you would like it to always reflect the current date. Otherwise, it will not change when the document is opened at a later date.
- Click OK. The date and time now appears in the document.
To remove content controls:
By default, some of the built-in headers and footers have snippets of text that are called content controls. Content controls can contain information such as the document title or company name, and they allow you to enter that information into a form field.
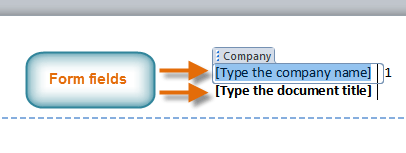 Form fields
However, you'll often just want to type a "normal" header without any content controls. To do this, you'll need to remove any content control fields from the header or footer.
- With the header or footer section active, right-click the Content Control field you wish to remove. A drop-down menu will appear.
- Click Remove Content Control. The Content Control field will disappear.
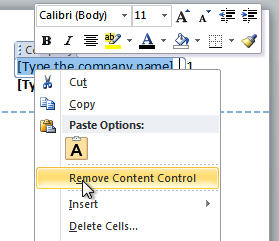 Removing Content Control
Other header and footer options
There are many other header and footer options you can use to design these sections of your document. You can review the Header & Footer Tools Design tab to view and explore these options.
 The Design Tab
Adding page numbers
Word can automatically label each page with a page number and place it in a header, a footer, or in the side margin. You can add page numbers to an existing header or footer, or you can insert page numbers into a new header or footer.
To add page numbers to an existing header or footer:
- Select the header or footer. The Design tab will appear.
- Place the insertion point where you want the page number to be. You can place it anywhere except inside a Content Control field.
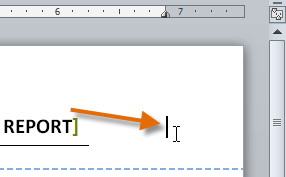 The insertion point
 - From the Design tab, select the Page Number command.
- Click Current Position, then select the desired style. The page number will appear in the document.
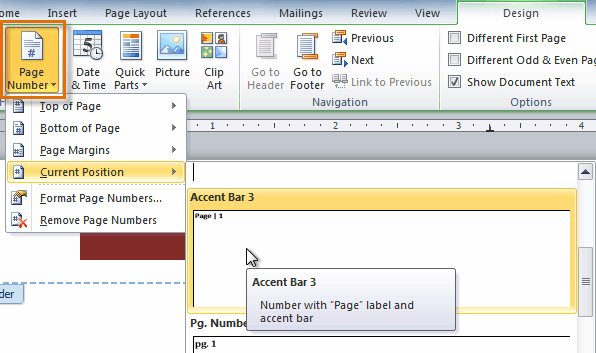 Selecting a page number
If you've already typed information into your header or footer, it's important to place the page number at the Current Position to avoid losing anything. If you select a page number from Top of Page or Bottom of Page, it will delete anything you have already added to the header or footer.
To insert page numbers into a new header or footer:
- From the Insert tab, click Page Number. A drop-down menu will appear.
- Select the desired page number style, and it will appear in your document.
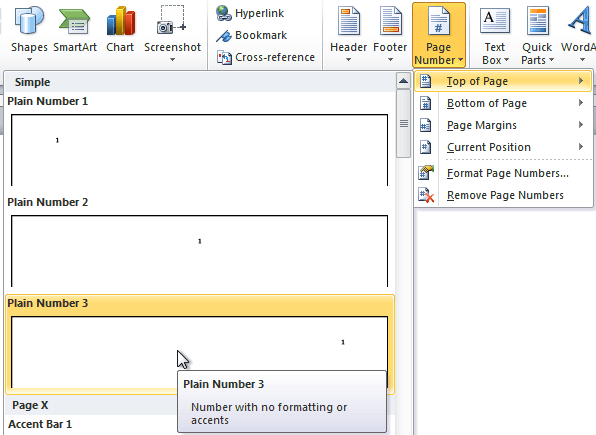 Inserting a page number at the top of the page
To hide the page number on the first page:
In some documents, you may not want the first page to show the page number. You can hide the first page number without affecting the rest of the pages.
- Select the header or footer that contains the page number.
- From the Design tab, place a check mark next to Different First Page. The header and footer will disappear from the first page. If you want, you can type something new in the header or footer, and it will only affect the first page.
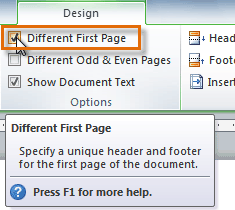 Hiding the page number on the first page
If you're unable to select Different First Page, it may be because an object within the header or footer is selected. Click in an empty area within the header or footer to make sure nothing is selected.
To format page numbers:
- Select the header or footer that contains the page number.
- From the Design tab, select the Page Number command.
- Click Format Page Numbers.
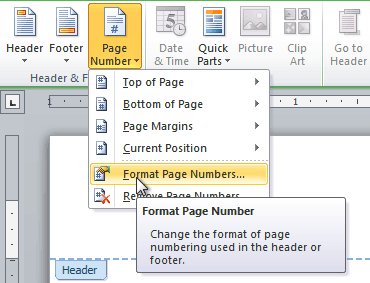 Clicking Format Page Numbers
 - From the dialog box, select the desired Number format.
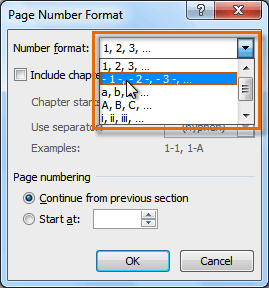 Selecting a number format
 - Next to Start at, enter the number you want the page numbers to start with.
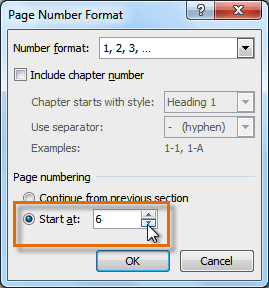 Selecting a starting page number
If you've created a page number in the side margin, it's still considered part of the header or footer. You won't be able to select the page number unless the header or footer is selected.
An alternative way to modify your page numbering is by using section breaks. To learn how to do this, read our article on Modifying Page Numbers in Word.
Challenge!
- Create a new Word document.
- Create a blank header.
- Add your name in the header of a document.
- Right-align the text in the header.
- Select a built-in footer.


