Word 2000
Using the Page Setup Dialog Box
Page 1
Introduction
By the end of this lesson, learners should be able to:
- Use the Page Setup dialog box
Page 2
Using Page Setup to Set Margins
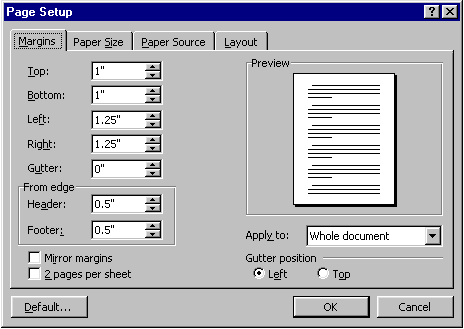
The Page setup dialog box allows you to change the margins of your document.
- Choose File
 Page
setup.
 - Click on the Margins tab in the Page Setup dialog box.
- Change the margins of your document by entering a new number in the box next to the margin that you wish to change.
- Click OK.
OR - Change the margin in precise steps by clicking on the up or down arrows next to the margin that you wish to change.
- Click OK.

Page 3
Other Tips for Setting up Margins
- Click the Default button in the lower left corner to set (or reset) Word's default margins.
- You can choose to apply these new margins to the whole document or from this point forward.
- Gutter position
In a document with two-sided pages, the term gutter refers to a margin setting that adds extra space to the side or top margin of a document you plan to bind. A gutter margin ensures that the binding doesn't hide text.
The default gutter position is left. You shouldn't need to change the gutter default. In left-to-right documents, the gutters of odd-numbered pages are always on the left, and the gutters of even-numbered pages are always on the right. - Mirror margins. Mirror margins are used when printing bound documents.
To change the mirror margins for part of a document:- Select the text.
- In the Apply to: box, click Selected text.
- Word automatically inserts section breaks before and after the text with the new margin settings.
- If your document is already divided into sections, you can click in a section or select multiple sections, and then change the margins.
Page 4
Using Page Setup to Set Page Orientation
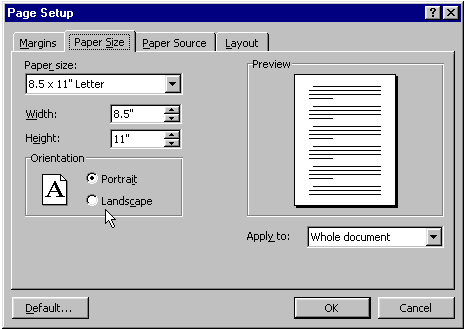
The default page orientation is Portrait (8.5 X 11).
If your document would display better in landscape orientation (11 X 8.5), you can change the orientation using the Page Setup dialog box.
To Change Page Orientation:
- Choose File
 Page
Setup.
 - Click the Paper Size tab.
- In the Orientation area, click the Portrait or Landscape radio button.
- The Preview area shows you how your document looks.
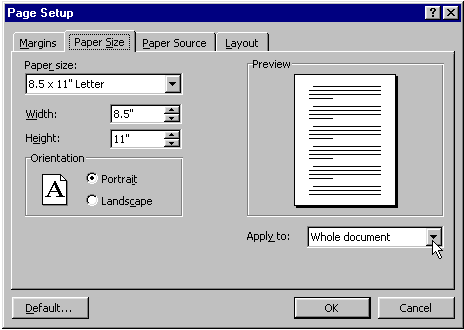
- Pay close attention to the Apply To: area.

Page 5
Using Page Setup to Set Paper Size
The default paper size is 8.5 x 11, but you can change the paper size entirely. You can even customize the paper size to include note cards, etc.
To Change Paper Size:
- Choose File
 Page
Setup.
- Click the Paper Size tab.
- In the Paper size area, adjust paper size using the drop down menu or the Width and Height scroll boxes.
- The Preview area shows you how your document looks.
- Pay attention to the Apply To: area.
- Click OK.

Page 6
Did You Know?
To Create a Title Page for Your Document:
- Enter the text you want on your title page.
- Choose File
 Page
Setup.
 - Click the Layout tab.
- Under Vertical Alignment, you will find the following options:
Top: Default. Text lines up with top margin.
Center: Text on page is centered between the top and bottom
margins.
Justified: Text is spread out so each line is same distance
apart.
Bottom: Text lines up with the bottom page.