
Outlook 2010
Collaborating with Calendars
Introduction
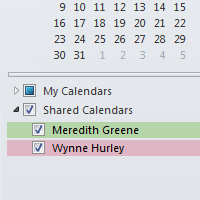
Outlook 2010 makes it easy to share your schedule and availability, a feature commonly used in the workplace to collaborate and arrange meetings.
In this lesson, you'll learn how to share your calendar and schedule meetings in an office environment. We'll also talk about using Schedule view to find the best possible time for group meetings and how to set your availability.
You must be connected to a Microsoft Exchange Server in order to use the features discussed in this lesson. If you are using Outlook 2010 on your home computer, you won't be able to use the calendar sharing and meeting features available to those using Outlook in the workplace.
Sharing calendars
In order to schedule meetings with other people in your workplace, your calendar must first be shared. Keep in mind that sharing can vary depending on your office's network, and your IT department may have already set your calendar sharing settings.
To share a calendar:
- From the Home tab, locate and select the Share Calendar command on the Ribbon. The Sharing invitation dialog box will appear.
 Sharing a calendar
Click the buttons in the interactive below to learn more about different calendar sharing options.
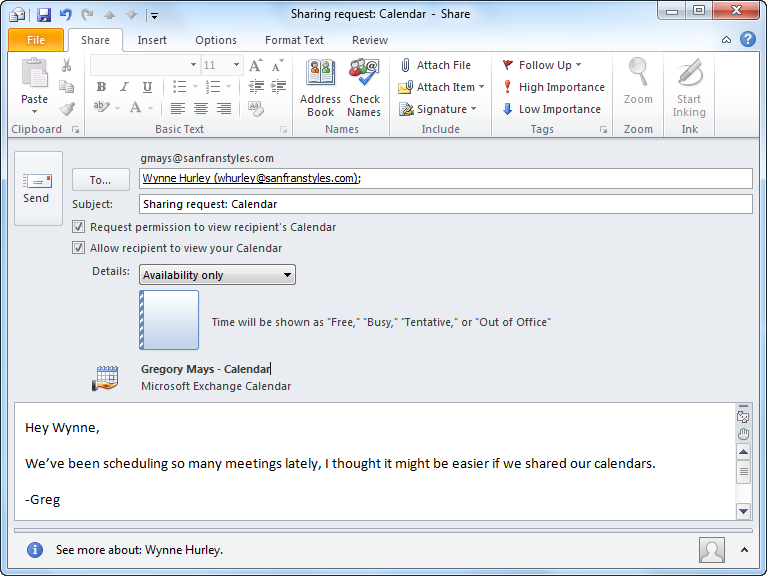
Request permission to view recipient's Calendar
Check this box to request that your recipients share their calendars with you.
Allow recipient to view your Calendar
Check this box to share your calendar with the recipient(s). This option should be selected by default.
Subject
Add a subject to let the recipient(s) know that they've been invited to see your calendar.
Recipients
Add recipients to the sharing invitation as you would an email message. Your calendar will be shared with all recipients.
Message
If you like, you can include a message to let your recipient(s) know why you're choosing to share your calendar.
Availability Details
Click the Details drop-down button to choose what information will be shared from your calendar. There are three availability options:
• Choose Availability only if you want to share just your Free/Busy time.
• Choose Limited details if you want to share the time and subject of your appointments.
• Choose Full details if you want to share all information about your appointments, including location.

Send
When you've finished modifying the sharing settings, click Send to share your calendar.
After you've shared a calendar, you can edit your shared calendar settings by changing your calendar permissions. Just click the Calendar Permissions command on the Ribbon.  Modifying calendar permissions
To open a shared calendar:
Whenever someone shares a calendar, you will need to open that calendar to view its details.
- Locate and select the Open Calendar command on the Ribbon, then choose Open Shared Calendar... from the drop-down menu.
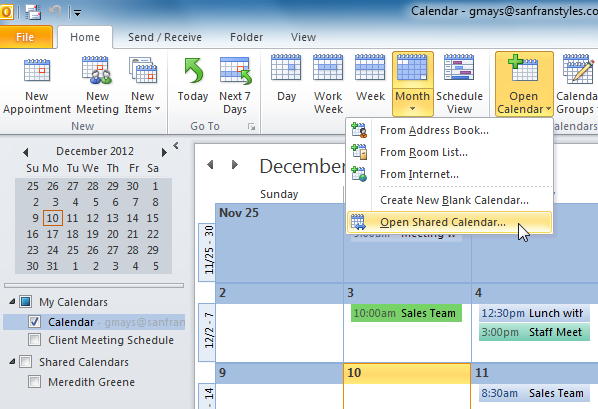 Opening a shared calendar
 - The Open a Shared Calendar dialog box will appear. Click the Name... button to choose a shared calendar from your address book.
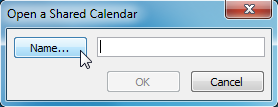 Clicking the Name... button
 - The address book will appear. Choose the contact whose shared calendar you want to view, then click OK.
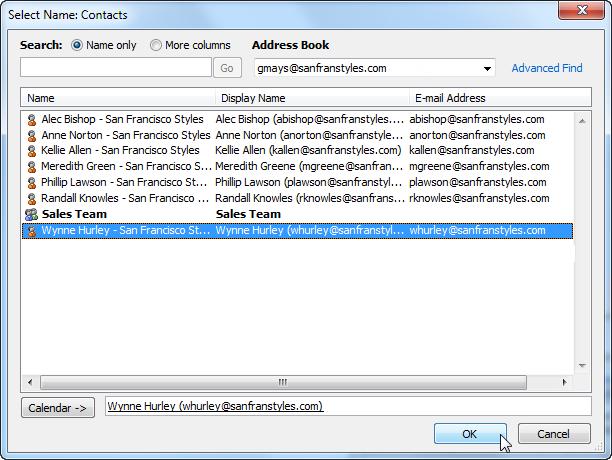 Adding a calendar from the address book
 - Click OK to continue.
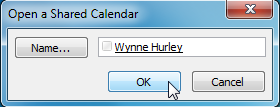 Clicking OK
 - The shared calendar will appear in the View pane. Click the check box in the Navigation pane to toggle the calendar on and off.
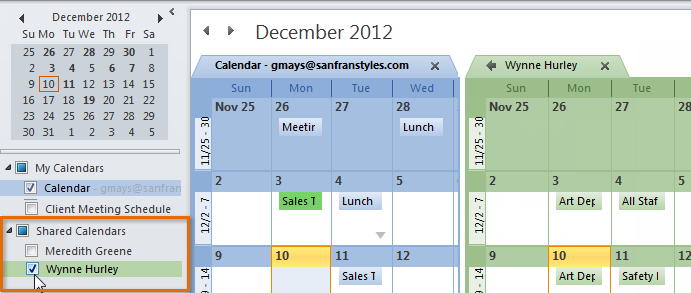 Viewing a shared calendar
Scheduling meetings
Once your calendar is shared with other users in your workplace, you can use your shared calendars to schedule meetings.
To send a meeting request:
A meeting is just like an appointment on your calendar, but with other attendees. To schedule a meeting, you must first send a meeting request.
- Locate and select the New Meeting command on the Ribbon.
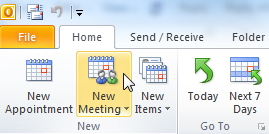 Scheduling a new meeting
 - The New Meeting dialog box will appear. Whenever you request a meeting, you'll actually be sending an email message to attendees. Enter attendees for the meeting into the To: field as you would enter recipients in the Compose window of an email.
 Adding attendees
 - Enter the information for the meeting. At the very least, you should include a subject, time, and location. You can also include a message as you would in an email.
- When you've finished entering meeting information, click Send.
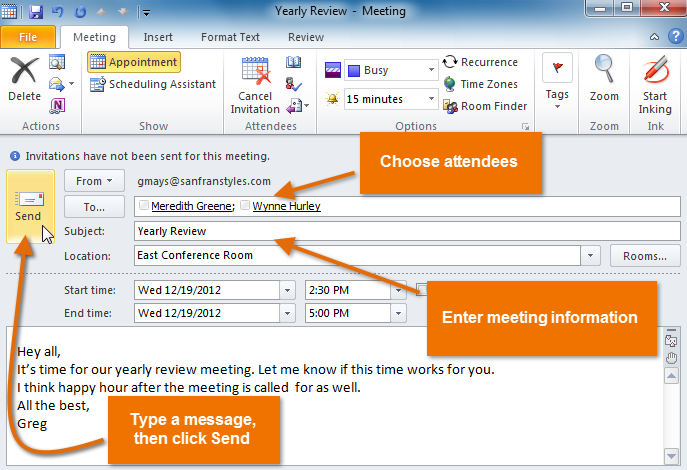 Sending a meeting request
 - The meeting request will be sent to the selected attendees, and the meeting will appear on your calendar. When your attendees accept the meeting request, the meeting will appear on their calendars as well.
 The scheduled meeting across three shared calendars
To accept a meeting request:
When someone wants to schedule a meeting with you, you will receive a meeting request as an email message.
- Navigate to Mail view. Locate and select the meeting request.
 Selecting the meeting request
 - Click Accept at the top of the message, then choose your desired option from the drop-down menu. You can choose to either edit your reply or simply accept the meeting.
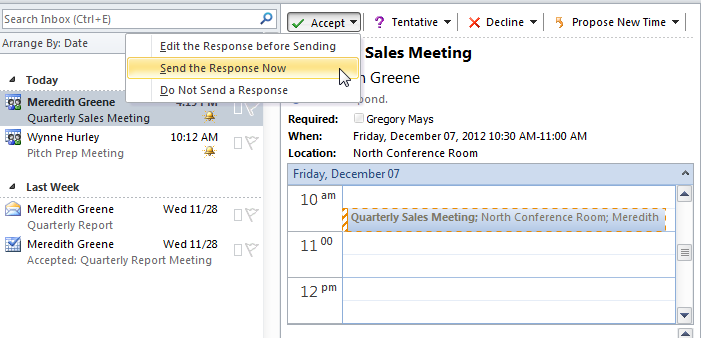 Accepting a meeting request
 - The meeting will be added to your calendar.
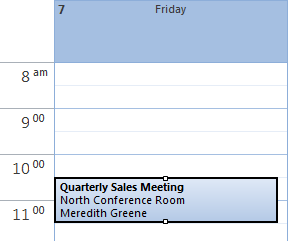 The added meeting
You can also request to reschedule a meeting directly from a meeting request. Just click Propose New Time, then select the desired option from the drop-down menu. The New Meeting dialog box will appear, allowing you to propose a new time to all meeting attendees.
 Proposing a new time for a requested meeting
Using Schedule view
If you need to schedule a meeting with a lot of people, it can be difficult to find a time that's best for everyone. Schedule view allows you to see a simplified version of your shared calendars, which makes it easy to find the perfect time for your next meeting.
- To access Schedule view, locate and select the Schedule view command on the Ribbon. Schedule view will appear, allowing you to see free and busy times for each of your shared calendars. Look for shared free time when scheduling a meeting.
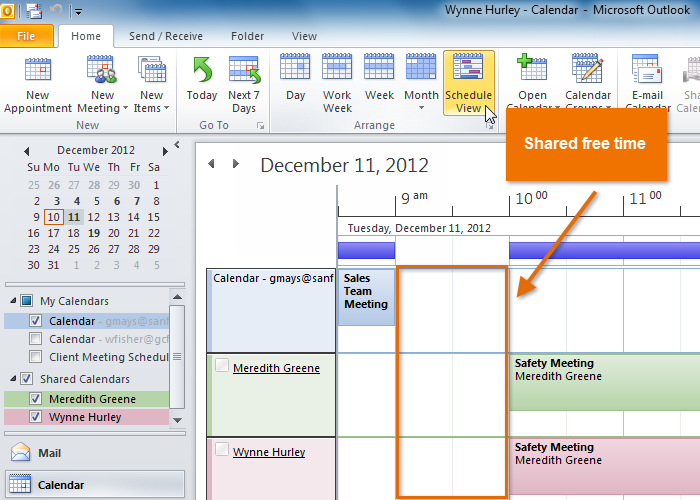 Using Schedule view to find shared free time for a meeting
Setting availability
By default, any scheduled appointments and meetings will appear as busy time in Schedule view, while all other time will appear as free. However, if you keep an especially busy schedule, you may wish to set additional free and busy times. For example, you may wish to set certain hours as busy to put aside time for your own work. Alternatively, you may wish to set certain hours as free if you want people to know you're available.
- To set your availability, create a new appointment, then click the Show As drop-down button to set your availability as either Free, Tentative, Busy, or Out of Office.
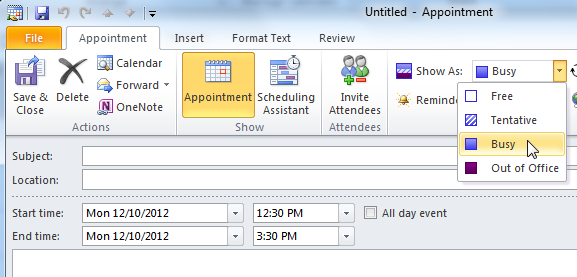 Setting availability
Challenge!
- Share your calendar with someone else.
- Open a shared calendar.
- Click the New Meeting command, and explore the meeting request options.
- Use Schedule view to view two or more shared calendars.