Google Drive
Managing Your Files
Organizing files
Once you start placing a lot of files onto your Google Drive, you can use folders to help organize and group your files. Folders in Google Drive work just like the folders on your computer. In addition, Google Drive makes creating and managing your folders easy.
To create a folder:
- While viewing your Google Drive, click the Create button, then select Folder from the drop-down menu.
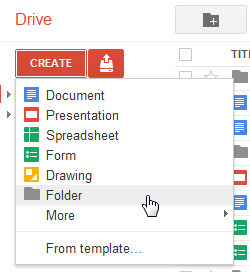 Creating a folder
 - A dialog box will appear. Type a name for your folder, then click OK.
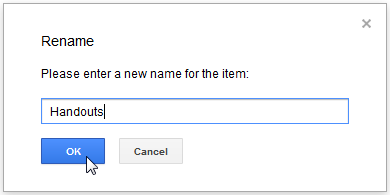 Naming the folder
 - Your folder will appear in the left-navigation pane below My Drive. You must click the drop-down arrow
 next to My Drive in the left-navigation pane to see your folders.
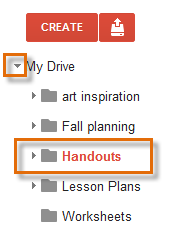 Viewing the new folder in the left-navigation pane
To further group your files, you can create a folder within an existing folder, known as a nested folder. To create a nested folder, select a folder and click the New Folder button ![]() . The new folder will appear as a nested folder.
. The new folder will appear as a nested folder.
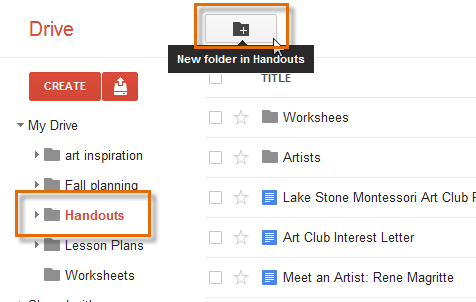 Creating a nested folder
To add files to folders:
- While viewing your Google Drive, locate the file you wish to add to a folder.
- Click, hold, and drag the file to the desired folder in the left-navigation pane.
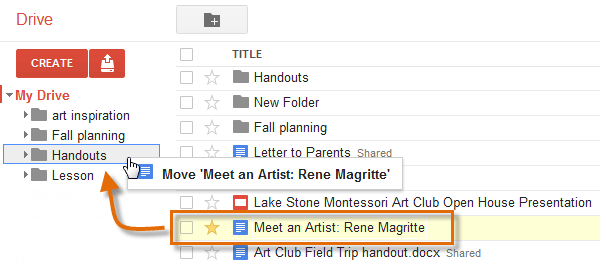 Adding a file to a folder
 - The confirmation dialog box will appear at the top of the page, confirming that the file has been moved.
 The moved file dialog box
 - The file is now stored in the folder.
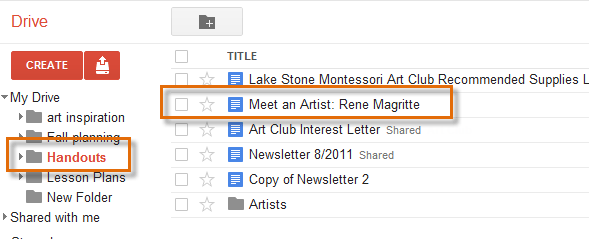 Viewing the moved file in the folder
To add multiple files to the same folder, select the files you wish to add by clicking their check boxes. Once you've selected them all, click, hold, and drag any selected file to the desired folder. All of the selected files will be added to the folder.
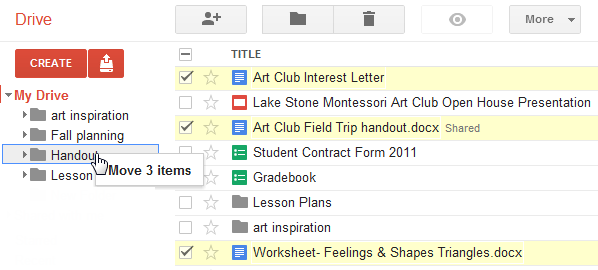 Adding multiple files to a folder
To move a file between folders:
- Locate and select the file you wish to move.
- The file action buttons will appear at the top of the page. Click the Move to button
 .
.
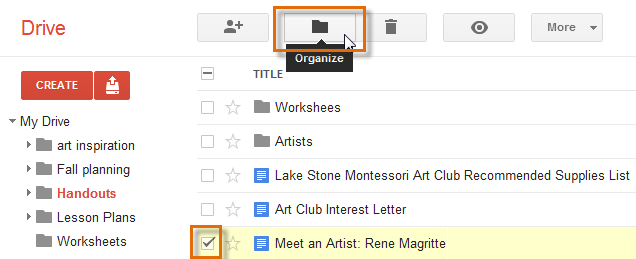 Clicking the Organize button
 - The Move to dialog box will appear. The file's current folder is indicated by the check mark
 .
.
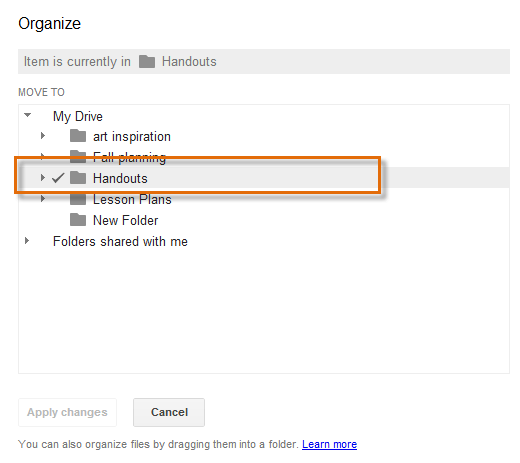 Viewing the Organize dialog box
 - Select another folder to store the file. A check mark
 will appear next to the selected folder.
 - Click Apply Changes. The file is now moved to the selected folder.
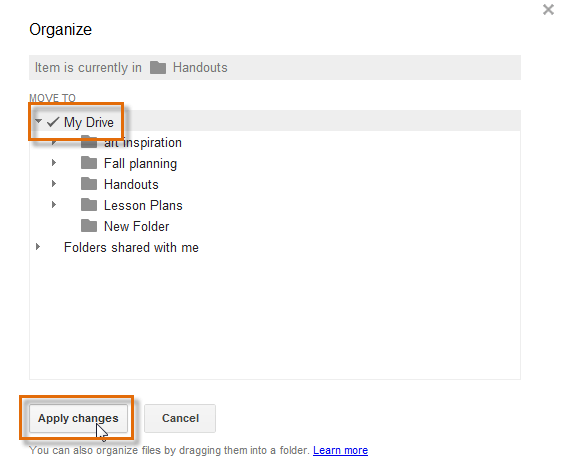 Moving a file to another folder
To set a folder color:
Once you have created several folders, you may wish to assign colors to your folders to help stay organized.
- Hover your mouse over the folder in the left-navigation pane, then select the arrow
 that appears.
 - A drop-down menu will appear. Hover your mouse over Change color, then select a color for the folder.
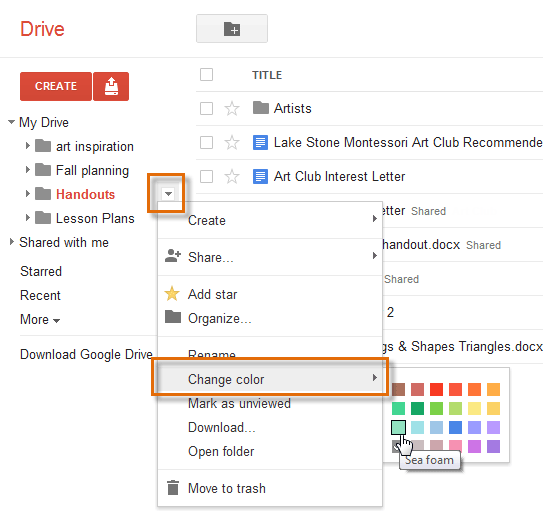 Selecting a color for a folder
 - The selected folder color will appear in the left-navigation pane.
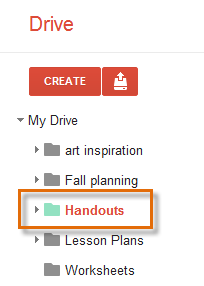 Viewing the new folder color
 - Any files stored in the folder will display the folder's color in the view pane.
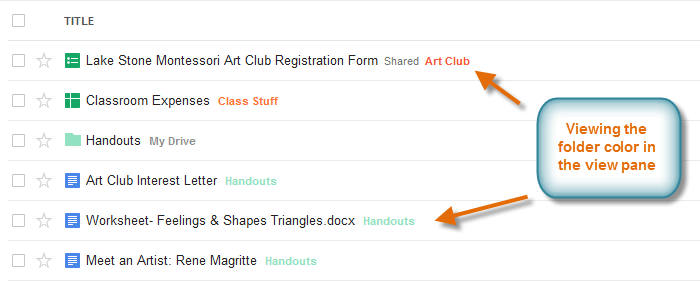 Viewing the folder color in the view pane


