
Digital Photography
Getting to Know Your Camera
Getting to know your camera
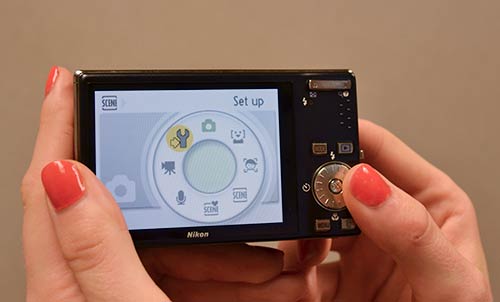 Changing a camera's settings
In order to take a photo, there are many different things your camera needs to take into account, such as focus and exposure. Most of the time, these things will be set automatically by your camera. However, you'll sometimes need to make manual changes to the settings to get the best possible photo.
The parts of a digital camera
Cameras come in many different shapes and sizes, so the exact buttons and features will vary. However, there are a few basic parts that almost all cameras have.
Review the interactive below to learn about the basic parts of a digital camera.
In the images below, you can see that the camera on the left has some additional buttons. Your camera may have a different layout, so you should consult your manual to learn about which buttons your camera has.
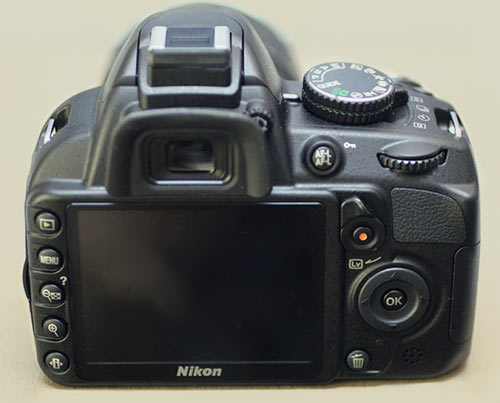 Buttons on a DSLR camera
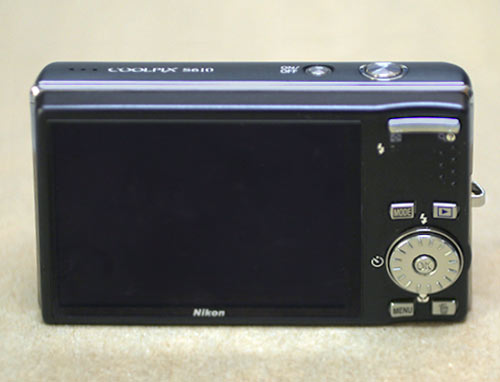 Buttons on a point-and-shoot camera
Getting the right exposure
Every digital camera has a sensor located behind the lens. The sensor is the part that actually captures the photo, much like the roll of film in a film camera (except you'll never take the sensor out of the camera). When you take a photo, the sensor is exposed to light for a fraction of a second, or sometimes longer. The total amount of light that is captured is called the exposure.
If the exposure isn't just right, your photo can come out too dark or too bright. Normally, your camera will handle the exposure automatically, although sometimes you will have to manually adjust the settings to get the desired result.
Focusing
Whenever you take a photo, you'll want your subject to be in focus. This means your subject is sharp and not blurry. Just like the exposure, the focus is handled automatically by the camera. However, your camera may try to focus on another object, which can cause your subject to be out of focus.
Your camera's LCD screen has a focus indicator, which is a box that shows what your camera is focusing on. To prevent focusing problems, you'll need to keep an eye on the focusing indicator whenever you take a photo.
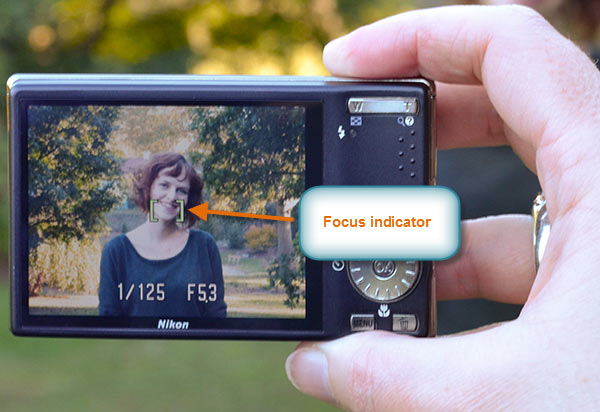 The focus indicator
DSLR cameras show the auto-focus information in the viewfinder (the window above the LCD screen). They also give you the option of focusing manually, if you prefer.
The shutter button
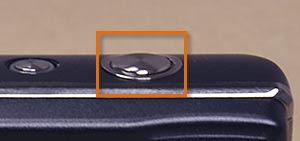 The shutter button
Most digital cameras have a two-stage shutter button, which means it can either be pressed halfway down or all the way down. When you press it halfway down, your camera will lock in the focus and exposure settings. After a second or so, the camera will beep to indicate that it is ready, and you can then press the shutter button the rest of the way down to take the photo.
If you simply press the shutter button down all at once, your camera won't have time to make adjustments, and your photo may come out blurry, too dark, or too light. Therefore, you should get in the habit of pressing it halfway down for every photo.
Many camera phones do not have a two-stage shutter button, so you may not have this option.
Common settings
Although your camera is designed to work automatically, there are a few settings you may want to change depending on the situation. There will usually be an icon next to each button, and these icons are the same no matter what brand of camera you have.
 Flash: Most cameras have a built-in flash to help you take photos in low-light situations. If the flash is set to Auto, then your camera will only use it when it needs to.
 Timer: If you're taking a group photo, you may not always have an extra person to take the photo. By setting the timer and placing the camera on a table or tripod, you'll have time to join your friends in the photo.
 Macro Mode: This is a setting you can use to take closeup shots. It allows the camera to focus on objects that are only a few inches away.
 Exposure Compensation: If your photos are coming out too dark or too light, you can use this setting to adjust the exposure.
- Zoom: If your camera has a zoom lens, then you can control the optical zoom using buttons or a dial (depending on the camera). On many cameras, you can zoom in even further by using the digital zoom. However, the digital zoom will lower the quality of your photos, so it's best to avoid it.
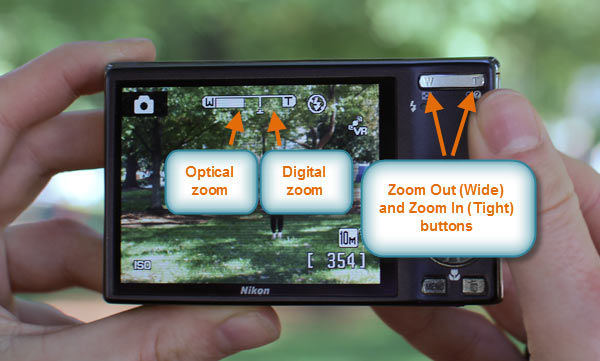 The zoom controls
Shutter speed, aperture, and ISO
Earlier, we talked about the importance of getting the right exposure. The exposure is actually controlled by three settings: shutter speed, aperture, and ISO. These settings work together to allow you to take photos in many different lighting situations, from bright sunlight to a dimly lit room.
Generally, your camera will set these automatically whenever you take a photo. However, as you'll see later on you can actually control these settings by adjusting the light or selecting a specific mode on your camera.
DSLR cameras give you much more manual control over the exposure, which is one reason they are commonly used by professionals.
Shutter speed
The shutter speed is the amount of time the shutter stays open. A slower shutter speed (such as 1/4 second) allows the camera to gather more light, while a faster shutter speed (such as 1/2000 second) allows you to freeze the action and avoid blurry photos. If you are using a tripod, you can use much slower shutter speeds and still take sharp photos as long as your subject isn't moving.
In the images below, the left image was taken with a slow shutter speed, and the right image was taken with a fast shutter speed.
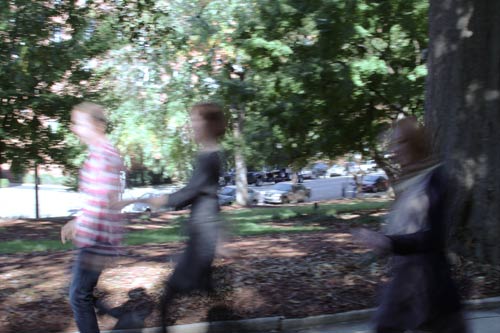 Slow shutter speed
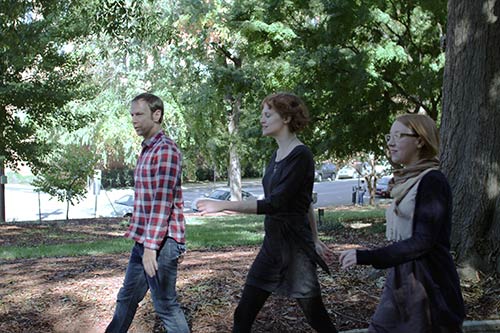 Fast shutter speed
Aperture
Camera lenses have a circular "window" that controls the amount of light that can reach the sensor (much like your eye's pupil). The size of this window is called the aperture, f-number, or f-stop. The aperture and shutter speed work together to control how much light gets to the sensor. For example, with a wide aperture (such as f/1.4), your camera will use a faster shutter speed, while with a narrow aperture (such as f/16) your camera will use a slower shutter speed.
The aperture also has an interesting effect on how the light is focused. With a larger aperture, the background will blur, while the subject stays in focus. This is known as shallow depth of field. We'll talk more about depth of field on the next page.
In the images below, the left image was taken with a wide aperture, which causes the background to blur (shallow depth of field). The right image was taken with a narrow aperture, so the background stays in focus (deep depth of field).
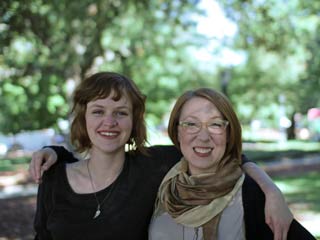 Wide aperture
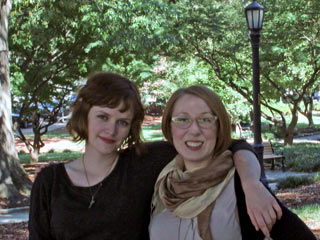 Narrow aperture
ISO
Digital cameras can adjust the sensitivity of the sensor, and this is known as the ISO number. For example, ISO 100 is a lower sensitivity, so it requires more light to create a good exposure. This generally means your camera will use a slower shutter speed and/or a wider aperture to gather more light. ISO 3200 is a higher sensitivity, so it can create a good exposure with less light. However, higher ISO numbers also add more image noise, which may make your photo too grainy.
In the images below, the left image was taken with a low ISO number, and the right image was taken with a high ISO number. The image on the right has lower quality and more image noise due to the high ISO number.
 Low ISO number
 High ISO number
If you want to see how different shutter speeds, apertures, and ISO numbers affect your photos, you can try the SLR Camera Simulator.
Depth of field
In any photo you take, you'll want your subject to be in focus. However, sometimes you may want the background to be out of focus to give a soft, artistic appearance to the photo. This is known as shallow depth of field. With a shallow depth of field, you can still focus on your subject, but objects that are closer or farther away will be out of focus. If you are using a DSLR or bridge camera, you can get this effect by choosing a wide aperture (such as f/1.4).
In the photo below, the depth of field is shallow, completely blurring the background.
 Shallow depth of field
Smaller apertures (such as f/16) will give a deeper depth of field, which means more of the photo will be in focus. For example, if you're taking a landscape photo you'll usually want a deeper depth of field so distant objects and foreground objects will all be in focus.
In the photo below, the depth of field is very deep, allowing the flowers and the mountains to be in focus (as well as everything in between).
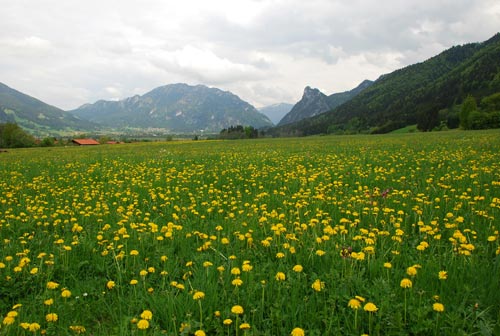 Deep depth of field
With a point-and-shoot camera, you won't have as much control over the aperture, so it may be difficult to get a shallow depth of field. If you want to get a shallower depth of field, you can zoom in or move closer to your subject. However, if you really want to experiment with different depths of field and have more creative control over your photos, you will usually need to use a DSLR or bridge camera.
Using scene modes
Many cameras include presets called scene modes, which you can access from your camera's menus or from a dial at the top. Each scene mode is geared toward a specific situation (or scene). For example, the Sports scene mode will use a faster shutter speed, and it may also use motion detection to help reduce blur. On the other hand, the Portrait scene mode is designed to easily focus on your subject, and it also adjusts the color balance so skin tones look as natural as possible.
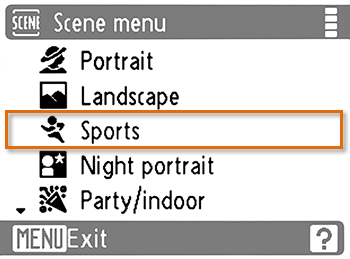 Selecting the Sports scene mode
If you don't use a scene mode, your camera will still make automatic adjustments to try to make the photo look good. However, scene modes are a great way to take more successful photos, so it's a good idea to use them as much as possible.