Digital Photography
Lighting
Indoor photos
 An indoor photo
For indoor photography, your light sources can include lamps, ceiling lights, sunlight through a window, and your camera's flash. This gives you more flexibility, as you can move lights or turn them on or off to control the direction and brightness of the lighting.
Generally, the more light you have, the better your photos will turn out. However, you'll also need to think about the quality of the light, as some types of light are more flattering than others.
Your camera's flash
You may be tempted to use the flash for all of your indoor photography, but pictures taken with flash often have dark shadows and bright highlights that can be harsh and unflattering. You may want to try turning off the flash and working with the other lights you have. You can turn the flash back on if you find that your pictures aren't coming out.
In the photos below, the left photo was taken with the camera's flash, which causes harsh shadows to appear behind the subject. The right photo was taken without flash, which gives the photo a more natural look.
 A photo taken with flash
 A photo taken without flash
Indoor lighting tips
In professional studio photography, there will usually be a primary light (often called a key light), which is located off to the side but still in front of the subject. There can also be a second light called a fill light, which is located on the other side of the subject to help reduce shadows. Sometimes the photographer will use other lights as well. This type of lighting setup will usually cost hundreds or even thousands of dollars.
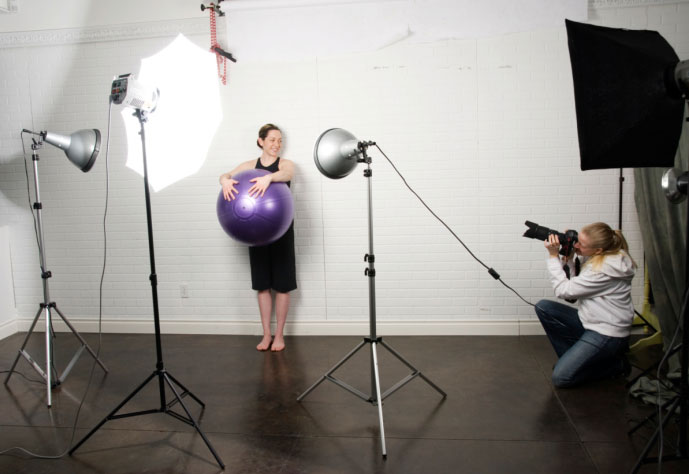 A professional lighting setup
If you're not a professional photographer, you probably don't have these types of lights. However, if you have lamps or a sunny window you can still position your subject to make the most of the lights you have. Here are a few tips you can use to take better indoor photos:
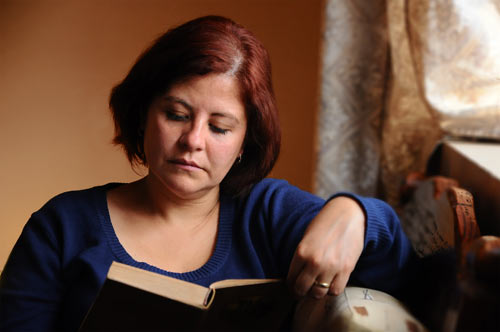 Natural light coming from the side
- Avoid having a sunny window behind your subject. This can make the background too bright, which will make the subject look too dark. Try moving the subject or the camera so the sunlight hits the subject from the side or at a 45-degree angle.
- Try turning off the ceiling lights and using one or two lamps as the light source. If you have two lamps, put one on each side of the subject to act as the key light and fill light. Remember, your camera can adjust the shutter speed and aperture to let in more light, so the picture won't necessarily be too dark.
- Use a tripod. If the lighting isn't ideal, a tripod will help prevent blurry photos.
- Try using the Party/indoor scene mode. This mode is designed for low-light situations.
- If you must use the flash, move your subject away from the wall. This will help to reduce dark shadows behind your subject.
- Experiment. The great thing about digital cameras is that you can view a photo right after you take it and then make adjustments. Try retaking the photo with different lighting, and see which version looks best.


